
SUMMARY: In this guide, Jetico explains why deleted files can still leave sensitive data behind in Windows 11 free space—and why that creates real security and compliance risks. You’ll learn what free space is, how data remanence works, and how to securely wipe it using built-in Windows tools or BCWipe. The article also shares best practices and Jetico-specific features, like Reserved Space, to make free space wiping faster, verifiable, and easier to manage.
Wiping free space on a Windows 11 systemis of paramount importance to protect both personal and customer data. Even after files are deleted from your computer, residual data may still remain in the free space on drives.
In this blog, we will explain:

What Is Free Space?
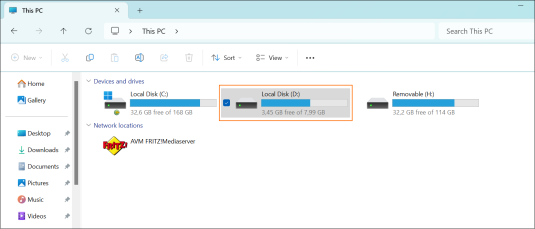
Before we begin, let’s clarify what free space is and why it’s important to address it. Free space refers to the portion of your hard drive that’s not currently occupied by any files or data. Despite its name, this space may still retain traces of data from previously deleted files.
Risks of Not Wiping Free Space on Windows 11
Leaving free space untouched poses significant risks to both personal and customer privacy and security.
NIST SP 800-88 emphasizes that residual data may remain recoverable unless storage media is properly sanitized, including unused space.
NIST SP 800-88 Rev. 1 – Guidelines for Media Sanitization
Residual data, also known as Data Remanence, persists even after completing common activities such as deleting or moving files. Sensitive information, including passwords, financial records and the personal data of customers could potentially be recovered by malicious actors. This leaves data vulnerable to breaches, identity theft or unauthorized access.
Methods of Wiping Free Space on Windows 11
Now that we understand the risks, let’s explore how to mitigate them by securely cleaning the free space on your Windows 11 system. There are 2 methods to achieve this:
- Built-in Tools
In Windows 11, you can utilize the Windows Terminal option to wipe free space. The technology behind this is Cryptographic Erasure, which is a way to erase data using encryption.
👍 Pros:
– Free; comes with the OS
👎 Cons:
– Not user-friendly; may be intimidating for beginners as it requires admin rights and use of the command prompt
– Since cryptographic erasure is used to perform sanitization, it may be impossible to verify
– Time-consuming - Third-Party Software
Alternatively, you can opt for trusted third-party software specifically designed for wiping free space on Windows 11, such as BCWipe. Skip to step-by-step instructions.
👍 Pros:
– Simple and intuitive
– Provides proof of compliance with standards via log files
– Verifiable
– Comes with advanced features that help simplify the wiping process, such as scheduling automation
– Consumes less time by using a unique innovation called ‘Reserved Space‘
👎Cons:
– Free trial available, but ongoing use requires purchasing a license
– Can be time-consuming if efficiency-enhancing features are not enabled and the chosen erasure standard includes a large number of wiping passes
How to Wipe Free Space on Windows 11 with Windows Terminal
To use the Windows Terminal, follow these steps:
- Start by clicking on the Menu and typing ‘Windows Terminal’.
- Initiate the Windows Terminal. Alternatively, press ‘Windows’ + ‘X’ and choose the Windows Terminal (admin) option.
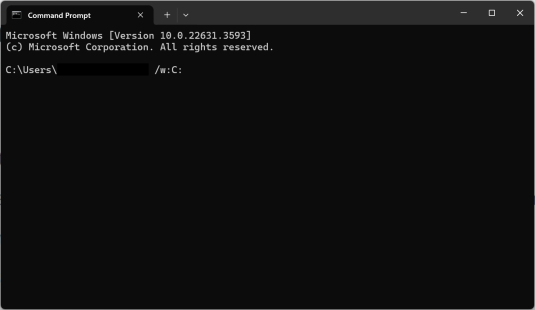
- Enter the command cipher ‘/w:X:’, replacing X with the letter of the drive you wish to cleanse for free space.
- Hit Enter. The command’s progress will be displayed in the Windows Terminal window.
Depending on the amount of free space and your system’s setup, the process will require some time to finish. Once done, all the free space on the chosen drive will be securely wiped.
How to Wipe Free Space on Windows 11 with BCWipe
In the following step-by-step instructions, we’ll use Jetico’s BCWipe, a reliable solution trusted by the U.S. Department of Defense.
To begin, install BCWipe. If you need help with the installation process, watch this instructional video. If you’re not yet ready to purchase BCWipe, you can begin your free trial today.
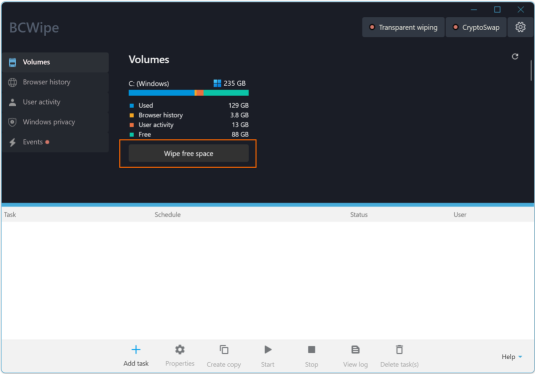
- Launch BCWipe Task Manager, then navigate to the ‘Volumes’ section.
- Click on the ‘Wipe free space’ button corresponding to the drive where you intend to execute the task (please note that only one drive is displayed in the screenshot below).
- To use default settings (which includes the 3-pass DoD 5220.22-M wiping scheme), Click ‘Start’.
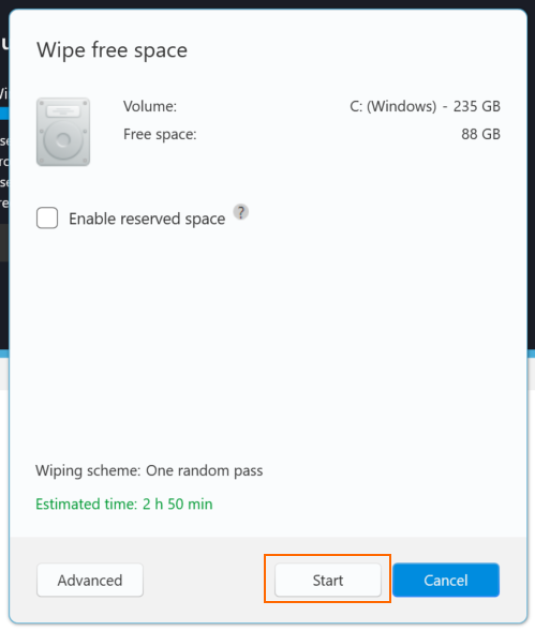
Settings can be easily reviewed and customized by clicking on the ‘Advanced’ button.
Best Practices for Wiping Free Space Windows 11
For optimal results when wiping free space, it’s important to follow these best practices:
Backing Up Data Before Wiping
Before initiating any disk-cleaning operations, it’s advisable to back up your essential data to prevent accidental loss.
Scheduling Regular Free Space Wiping
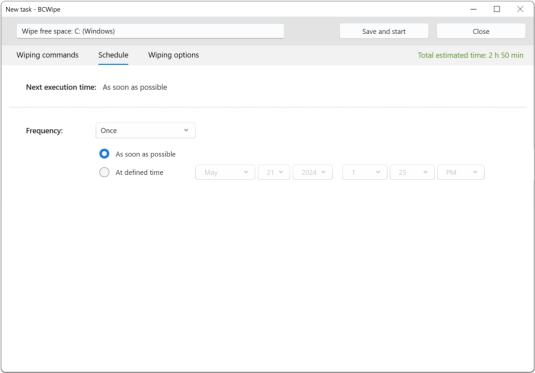
Regularly run the wipe free space command to maintain system performance and security. With BCWipe, you can conveniently schedule these tasks in the following way:
- Before clicking ‘Start’ (as shown in the screenshot above), click on ‘Advanced’
- Navigate to the ‘Schedule’ tab
- Set the desired ‘Frequency’
- Click ‘Save and start’ when ready
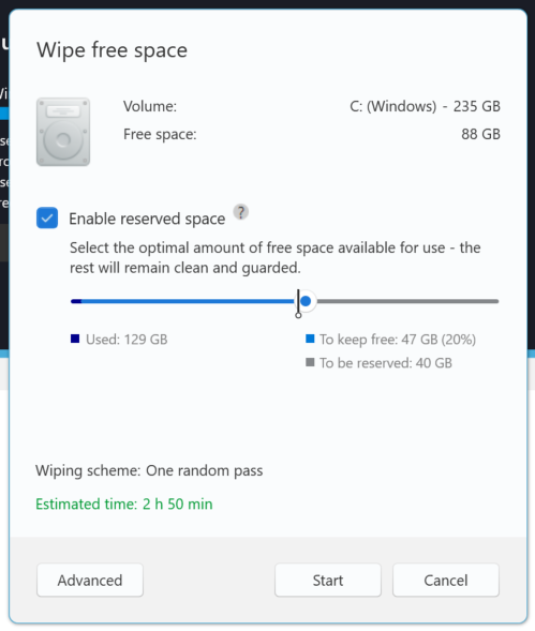
Improving Performance with Reserved Space
Wiping free space is a time-consuming process. To speed up the task, consider enabling ‘Reserved Space’. This unique BCWipe feature allocates a portion of free space after wiping, ensuring that it remains unutilized and does not require wiping during subsequent operations. The reserved free space will be automatically released in case the disk begins to fill up. To activate this option, check the ‘Enable reserved space’ box before clicking ‘Start’.
Wipe Free Space on Windows 11 – Conclusions
Congratulations, you have now wiped free space on Windows 11!
If you want to learn more about wiping drives and files, why not check our ultimate guide?
For more tips on data protection and computer security you can also reach out to our Data Protection Specialist for personalized assistance.
Happy Wiping!
Frequently Asked Questions (FAQs)
No, wiping free space only targets deleted files, ensuring that any existing data remains intact.
Once free space is securely wiped, it becomes extremely difficult, if not impossible, to recover deleted files.
Yes, BCWipe is compatible with SSDs. For instructions on deleting files on SSDs, check out our blog “How to Delete Files on SSD”.
No, Storage Sense in Windows 11 is designed to help users automatically free up space on their drives by deleting temporary files, system files and items in the Recycle Bin. However, it does not wipe free space to remove traces of previously deleted files.
We recommend wiping free space regularly to maintain optimal system performance and security. Ideally, this should be done once every few weeks. However, the frequency should be based on factors such as how sensitive your data is and how often you delete files. Depending on these factors, wiping free space every week to every month is advisable.