
SUMMARY: Deleting a file does not remove the data behind it, and those leftover traces can still be recovered. This guide explains why data remanence is a privacy risk and how BCWipe can permanently erase deleted files that standard deletion leaves behind. You’ll learn when to wipe individual files versus wiping free space, how HDDs and SSDs behave differently and how to follow clear steps to make sure old data cannot be restored.
Do you know how to wipe deleted files from your hard drive? Although it may be simple to do, there are still far too many people deleting files incorrectly and leaving themselves open to data breaches and other security risks.
This guide will take a look at the risks of ‘deleting’ files by normal means and offer 2 secure solutions you can use instead: wiping files, or wiping free space and data remanence. After weighing the pros and cons of both options, we’ll then walk you through step-by-step instructions on how to implement each solution.
Why Wiping Deleted Files from Your Hard Drive?
It’s common knowledge that when you right-click on a file you’re given the option to ‘delete’ it. This sends the file to the Recycle Bin, which can then be emptied, and the file seems to vanish. The only problem is that files ‘deleted’ in this way don’t truly disappear from your hard drive. Instead, these files remain on your computer and can be retrieved with easily accessible file recovery software. This problem exists due to data remanence.
To avoid someone gaining access to your old files, you should permanently delete data in one of 2 ways.
- Wipe files
The most common way of wiping deleted files from your hard drive is to permanently remove them with data wiping software.
Pros: Wiping files with data wiping software is a simple and straightforward option that doesn’t require you to take any additional steps. Just select the file and wipe it.
Cons: Files you delete with data wiping software cannot be retrieved. If you wipe something accidentally, then it’s gone for good.
Find the instructions on wiping files here. - Wipe free space & data remanence
An alternative way is to first ‘delete’ files normally – moving the files to your recycle bin and then emptying it – and then use a data wiping tool to wipe the free space and data remanence.
Pros: This is a good solution for those who still ‘delete’ files by normal means. You can then choose to wipe the free space and data remanence afterwards. This approach allows time to recover files that you have ‘deleted’ by accident.
Cons: This option is more time consuming and requires a 2-step process to delete your files. For proper security, it’s also wiser to wipe files immediately than leaving them in the recycle bin where they could potentially be accessed by a third party.
Find the instructions on wiping free space and data remanence here.
For SSD Users…
If you use a solid-state drive (SSD), you effectively have to combine both solutions in order to wipe your deleted data. First, you need to wipe the files with data wiping software. Then separately, you have to wipe the free space and data remanence.
For more detailed instructions, check out our blog on how to delete files on SSDs in 3 easy steps.
How to Wipe Files
Step 1: Select Your Files for Wiping
Begin by installing BCWipe, unless you have already done so. For anyone who wants help with installing the software, please watch this how-to video. Not ready to commit to buying BCWipe yet? Not to worry — you can get started with your free trial today.
Once you have installed the software, you can quickly wipe files from your hard drive without opening the full BCWipe program by simply using the handy right-click feature.
- Right-click on the file you want to wipe and select ‘Delete with wiping’
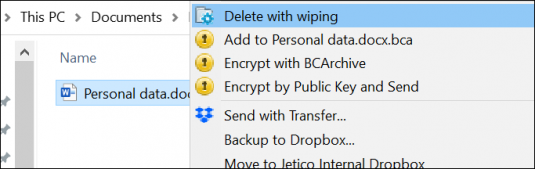
- Select ‘Yes’ to run BCWipe with administrator privileges

Note: BCWipe will erase your selected files beyond recovery, so double check that you have selected the correct files!
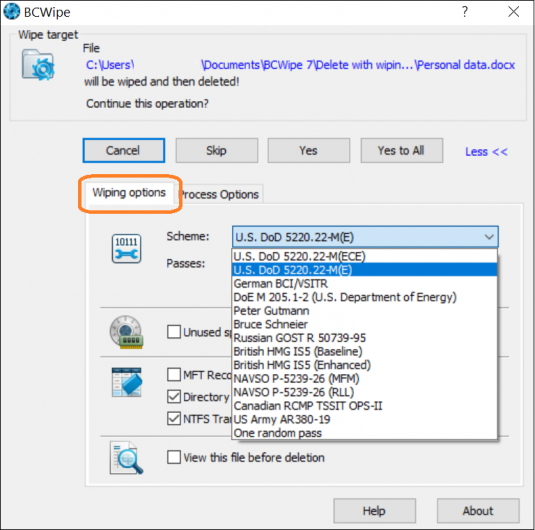
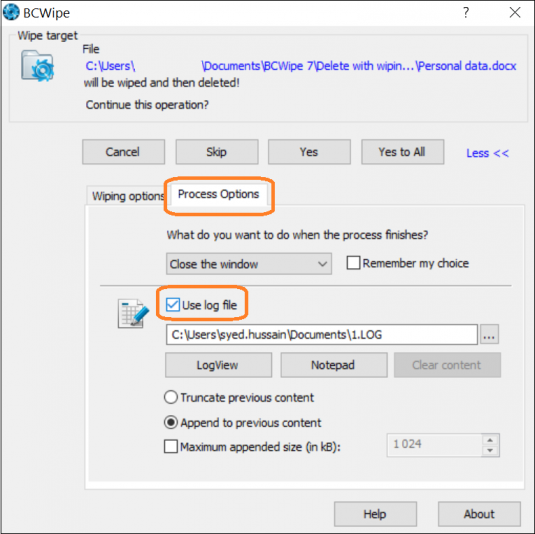
Step 2: Review Wiping Settings
BCWipe comes with default wiping settings.
- Click ‘Yes’ to wipe with default settings, or select ‘More >>’ to edit settings
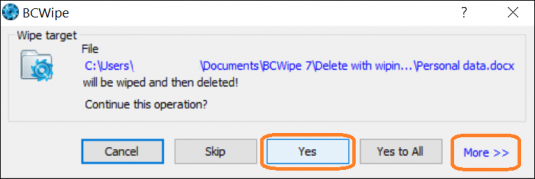
By selecting ‘More >>’ you can:
- Set wiping schemes and other wiping options in the ‘Wiping options’ tab
- Enable logging by checking ‘Use file log’ in the ‘Process Options’ tab
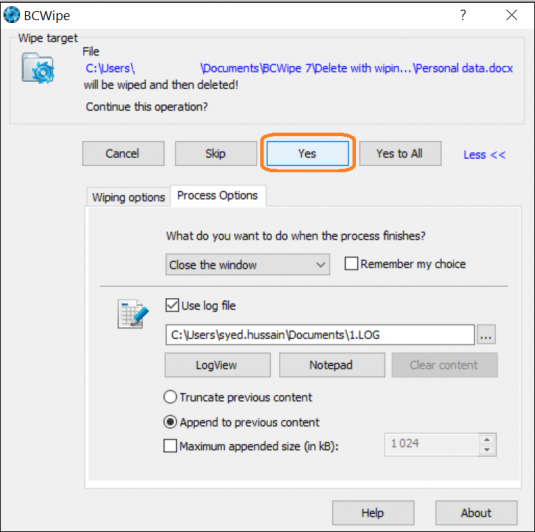
Step 3: Wipe Your Files
Now there’s nothing left to do but wipe your files! Click on ‘Yes’ to start the wiping process.
Your selected files are now being wiped.
How to Wipe Free Space & Data Remanence
Before you start wiping the free space and data remanence that your files left behind, it might be helpful to understand that wiping free space refers to the process of overwriting everything on the drive that doesn’t contain an active file. This includes cells that were completely empty.
Step 1: Enable ‘Wipe Free Space’
Begin by installing BCWipe, unless you have previously done so. Not ready to buy yet? No problem, you can get started with your free trial now.
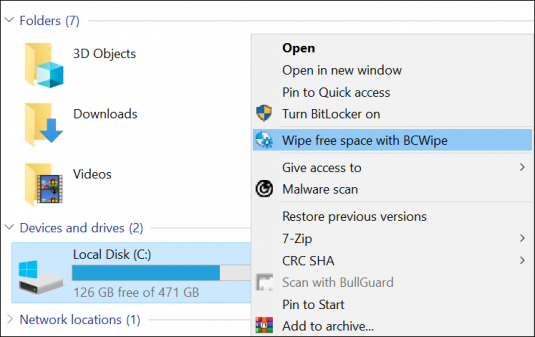
A quicker way of wiping the free space and data remanence that your ‘deleted’ files have left behind is to use BCWipe’s right-click feature.
- In Windows Explorers, right-click on the drive you want to wipe and select ‘Wipe free space with BCWipe’
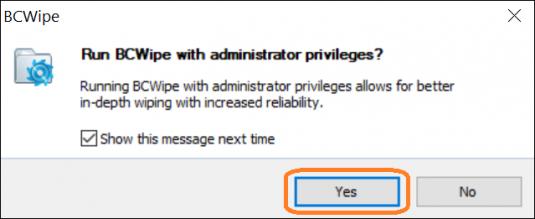
- Click ‘Yes’ to run BCWipe with administrator privileges
Step 2: Review Additional Settings
At this stage, you can review and set additional options and settings.
- If your Recycle Bin isn’t currently empty, click on the ‘Empty’ button
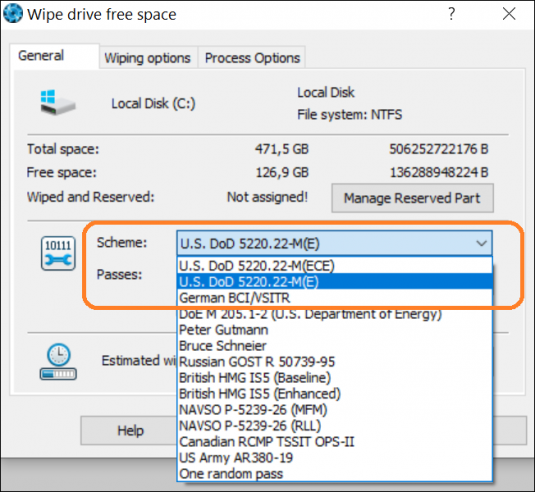
- Under the ‘Scheme’ drop-down menu, select the wiping schemes you want to use
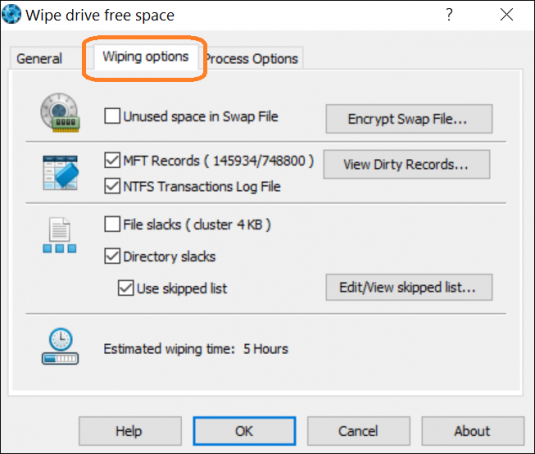
- Additional wiping options can be selected from the ‘Wiping Options’ tab
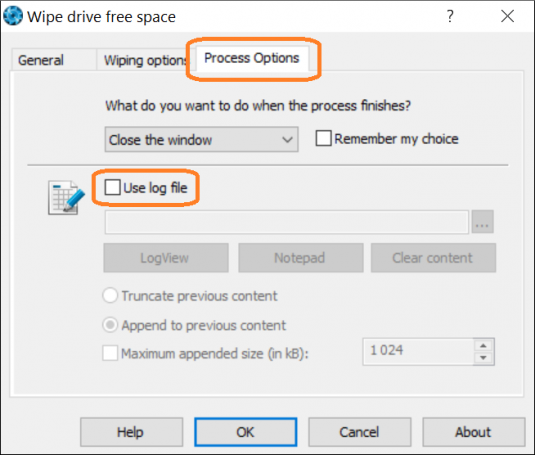
- To enable logging, check ‘Use file log’ in the ‘Process Options’ tab
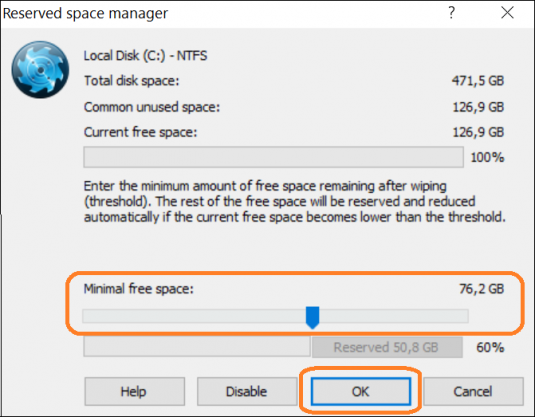
Step 3: Manage Reserved Space
This is an optional step that reduces the amount of time that wiping free space and data remanence takes. By using the ‘Manage Reserved Space’ feature, BCWipe will block off a part of your computer’s free space after it has been wiped, which reduces the amount of free space that needs to be wiped in the future.
- Select the ‘Manage Reserved Part’ option in the ‘General’ tab
- Drag the slider to define a threshold
- Click on ‘OK’ when ready
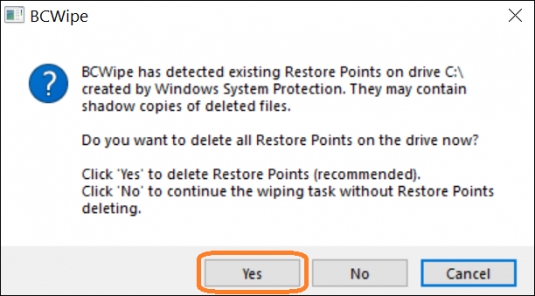
Step 4: Delete Windows Restore Points
If Windows Restore Points are detected, you will be prompted to delete them. In this case, it is recommended to select ‘Yes’.
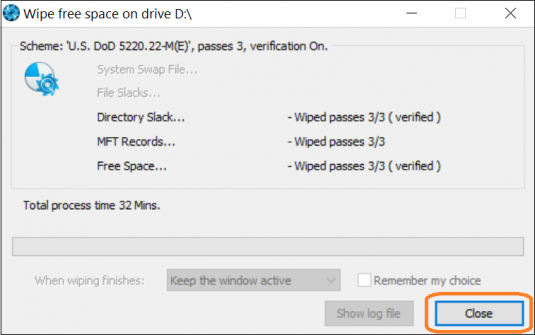
Step 5: Wipe Free Space and Data Remanence
The process of wiping the drive’s free space and data remanence will now start. You will see this screen after the wiping task has finished.
Congratulations, you now know how to wipe deleted files from your hard drive!
To learn more about keeping your computer clean, such as wiping your browser history, check our ultimate guide.
Happy Wiping!
Frequently Asked Questions (FAQs)
Emptying the Recycle Bin removes only the file’s reference, not the underlying data. That leftover information — known as data remanence — remains on the drive and can be easily recovered with free file-recovery tools. Secure wiping is needed to ensure deleted files cannot be restored.
Wiping files permanently erases selected items the moment you delete them, making it a fast and secure option. Wiping free space overwrites all previously used areas on the disk, including remnants of files deleted earlier. It’s useful if you prefer to delete normally first, but it requires more time and is more effective when done regularly.
SSDs handle data differently due to wear-leveling, so wiping deleted files requires a two-step approach: wipe the files directly, then separately wipe free space and data remanence. This combination ensures all remnants are overwritten, even in locations the SSD reallocates behind the scenes.
No. Secure wiping overwrites the file’s contents beyond forensic recovery. Because the process is irreversible, it’s important to double-check your selections before wiping — especially when using right-click “Delete with wiping” options.
BCWipe provides both options: wiping individual files instantly via right-click, and wiping free space and data remanence across whole drives. It’s designed to eliminate all recoverable traces and help maintain compliance with data-protection standards.