Quick start
This Quick Start guide walks you through running your first data discovery task in Jetico Central Manager (JCM). In the example below, you will search managed computers for Personal Identifiable Information (PII) created recently and stored in common document formats. PII is one of the most universal categories of sensitive data, making it a practical and widely applicable scenario for getting started with Search.
Before beginning, make sure the Search module is activated and deployed. This Quick Start also assumes that client computers are already added to JCM, as Search runs only on deployed endpoints. See How to Activate Search in JCM.
|
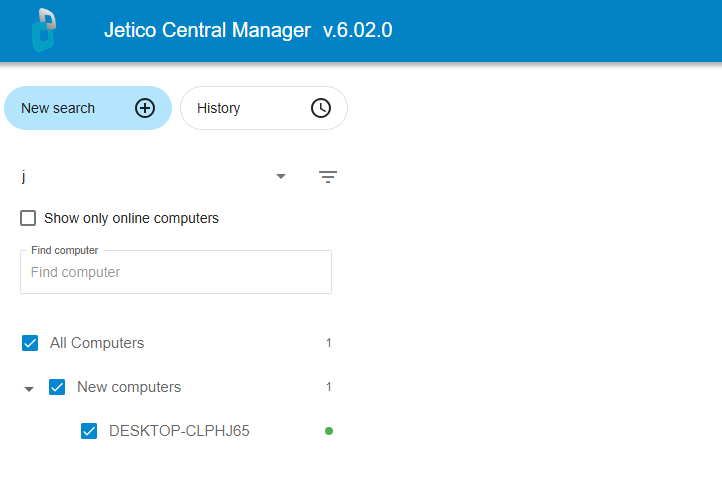
1. Open the Search page and select computers Log in to Jetico Central Manager using an account with Administrator or Operator permissions. Then select the Search tab in the top ribbon menu. This opens the workspace where you configure and run data discovery tasks. In the left-side list of computers and groups, select the endpoints where you want to run the search. You can choose individual computers or entire groups, depending on your task. |
|
|
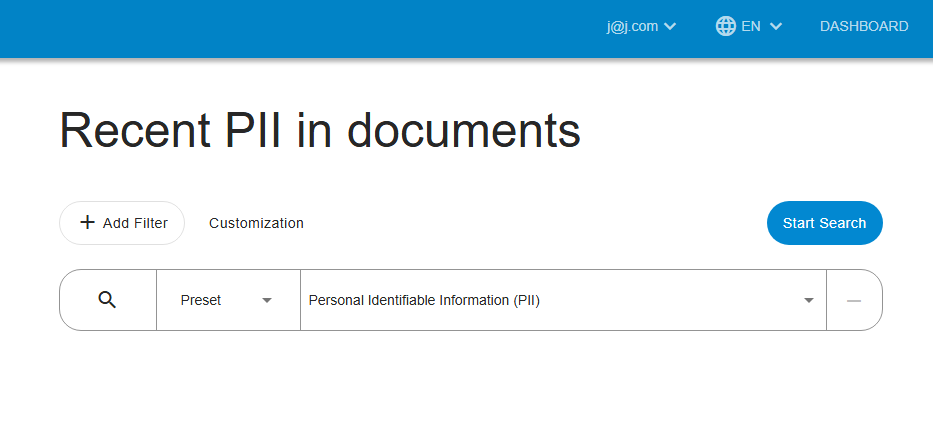
2. (Optional) Name your search At the top of the Search page, change the default name (for example, “Untitled Search – <date>”) to something that describes your task, such as “Recent PII in documents”. |
|
|
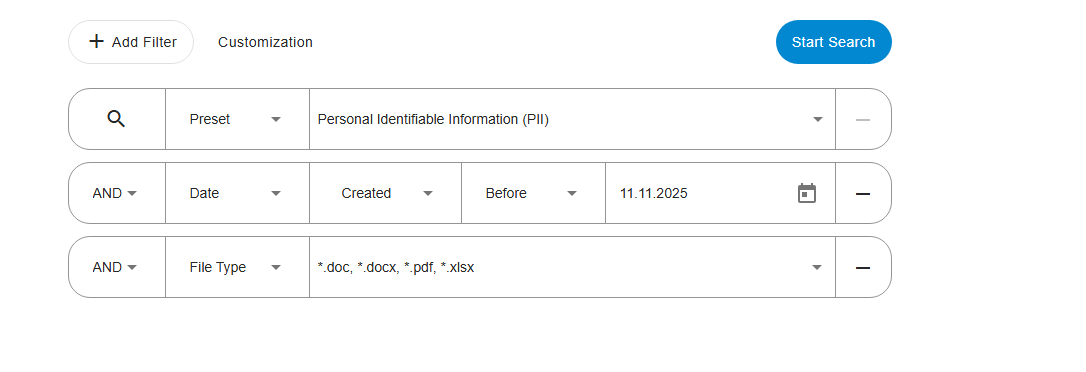
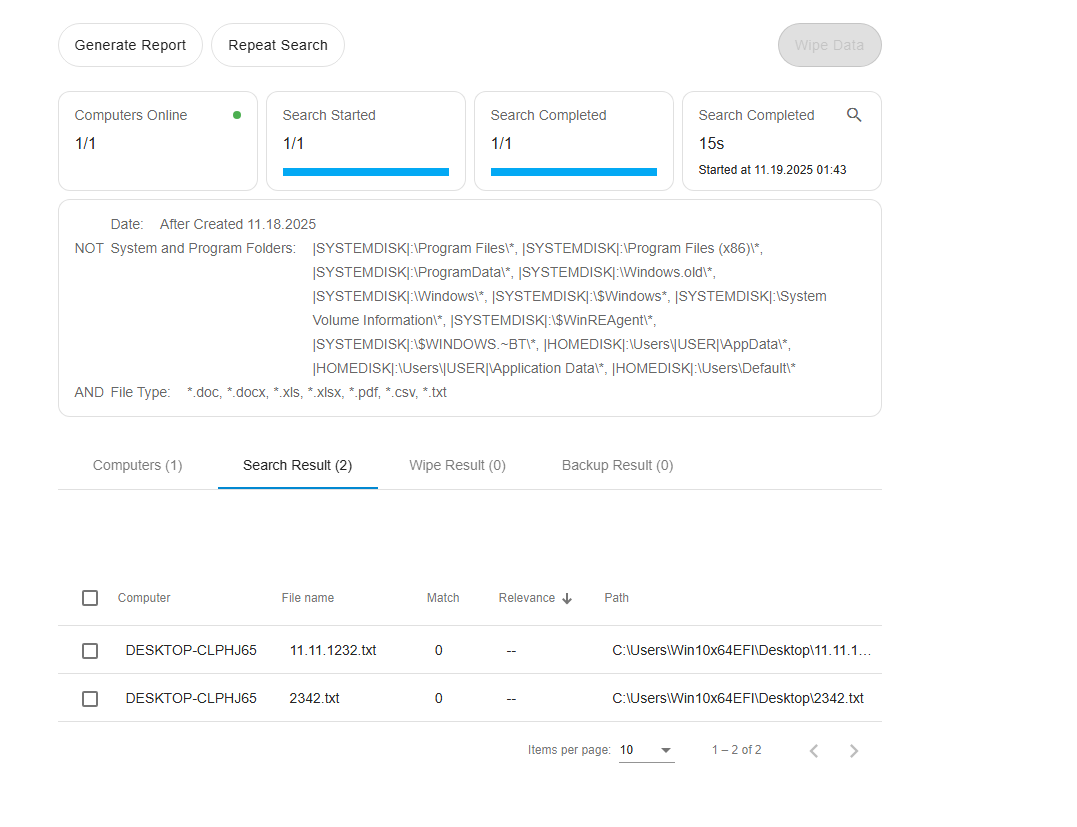
Use the + Add Filter button and choose from the drop-down list the filter type based on the information you want to locate. For this Quick Start example, apply the following filters:
Adjust the parameters for each filter as needed. For more information about filter types, see Search Filters by Type of Information and Search Filters by File Attributes. |
|
|
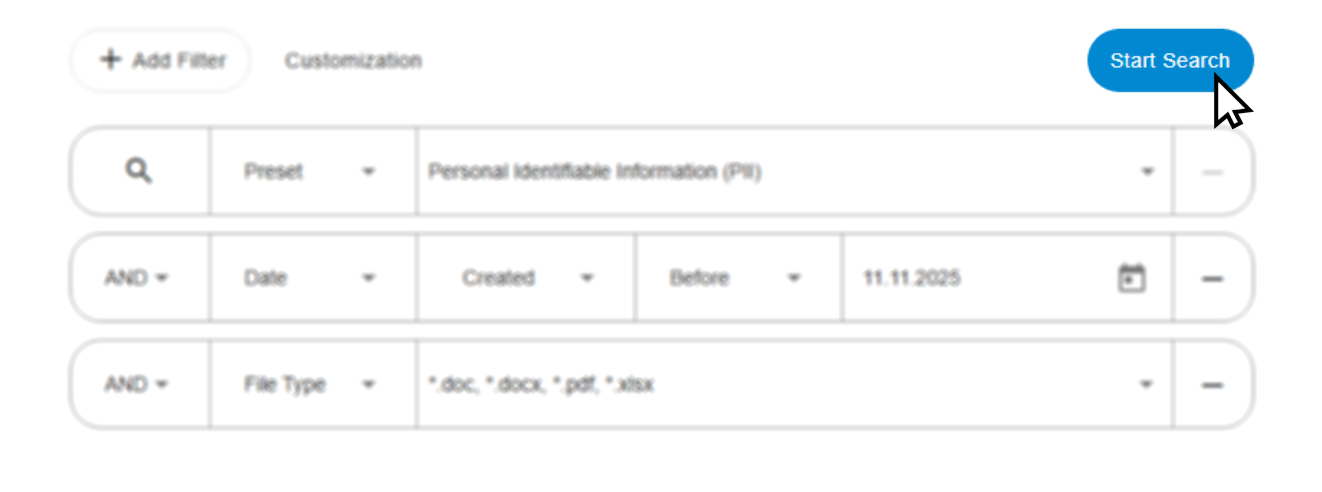
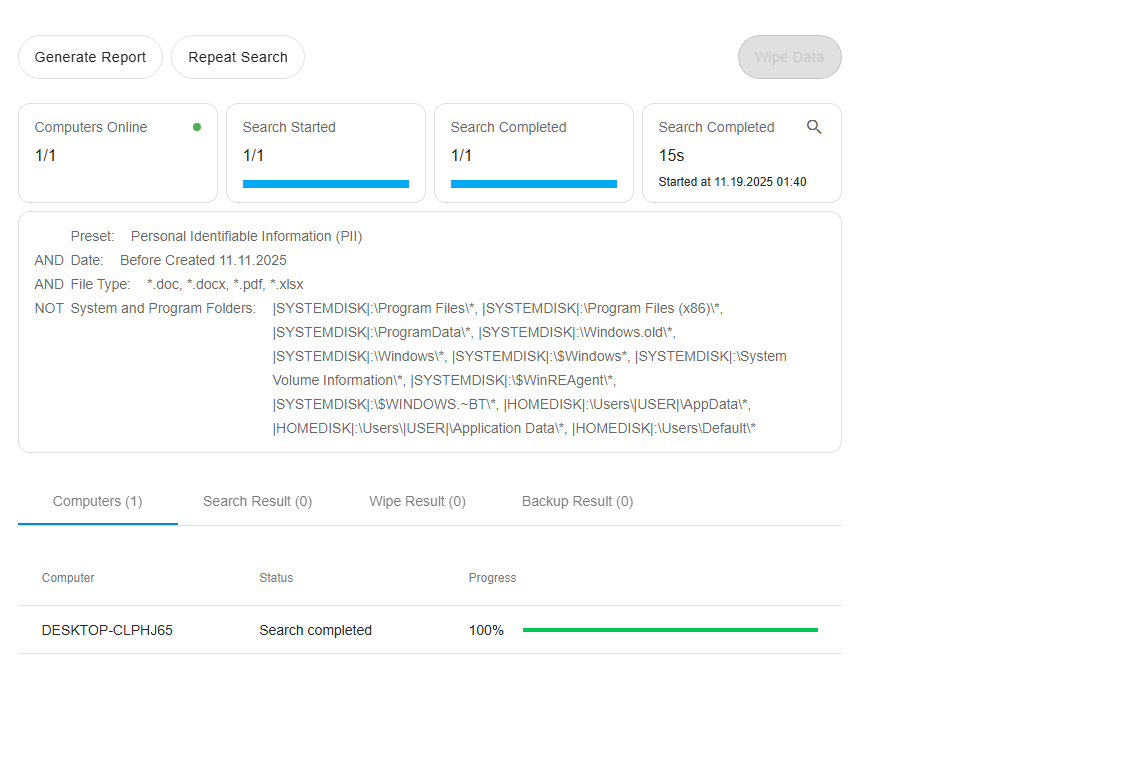
Click Start Search to begin the task. If your search uses only a high-level filter such as a Preset, JCM may display a warning that the results could be too broad and may include system or program files. This message also recommends adding exclusion filters for system locations. You can choose to add recommended exclusions now by clicking Add Filters or continue with the example search as configured. Once confirmed, the search starts, and the Search Results page opens automatically. |
|
|
5. Monitor progress and review results As soon as the search begins, the page displays the overall progress: how many computers have started the task, how many have completed it, and the overall task status. Matching files will appear in the Search Results tab as they are found. You can open and review these items while the search is still running. If needed, you can adjust your filters and rerun the search at any time. |
|
|
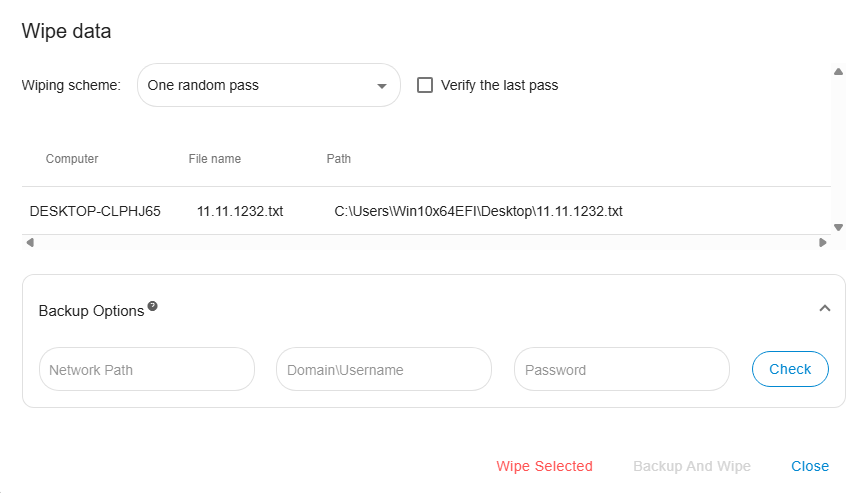
6. Work with the completed results When the search has finished, you can take further action on the results. You can:
For detailed instructions on each option, see Search Results.
|
|