Importing a Policy from Client Configuration
This article explains how to create or adjust a BestCrypt Data Shelter policy on a client computer and import it into Jetico Central Manager as a Global Policy.
Use this method when you want to build a policy from a representative computer instead of defining all allowed users, applications, and folder paths manually in JCM.
Before you begin, make sure that BestCrypt Data Shelter is installed on the client computer and that the computer is managed by JCM.
To import a policy from a client computer
1. Select the client computer in JCM
In the JCM Console, select the client computer that you want to use as the source for the policy.
Choose a computer with a typical configuration for the group of computers where the policy will later be applied.
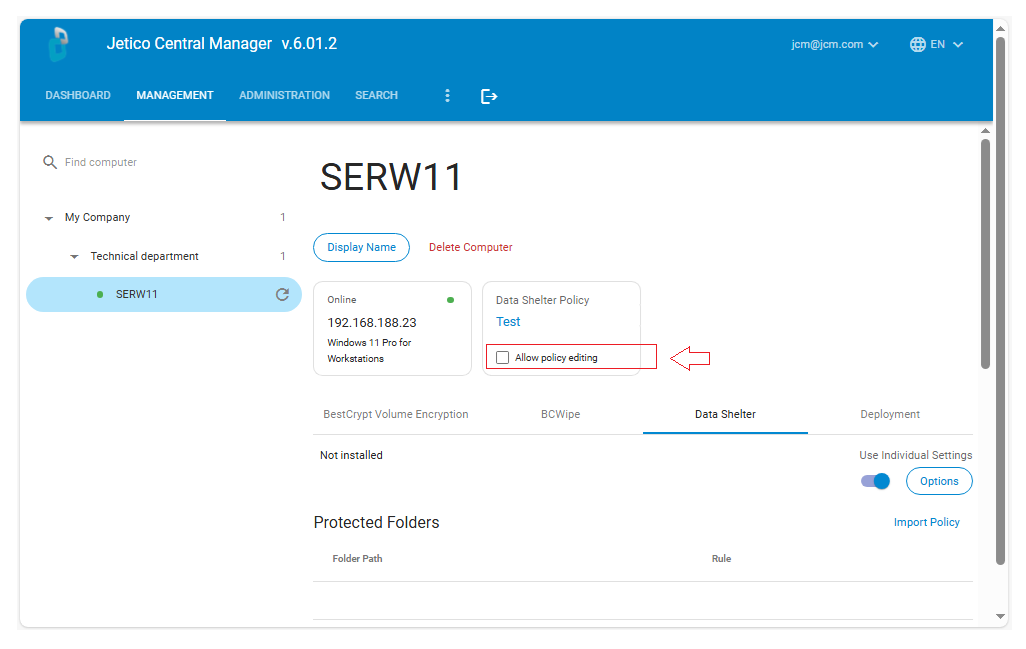
2. Allow local policy editing
Enable Allow policy editing for the selected computer.
This allows the local administrator to create or change the Data Shelter policy directly on the client computer.
Do not use this option for regular managed computers unless local policy changes are required.
3. Open BestCrypt Data Shelter on the client computer
On the selected client computer, open BestCrypt Data Shelter.
The local Data Shelter interface shows the folders protected on that computer and the policy settings available locally.
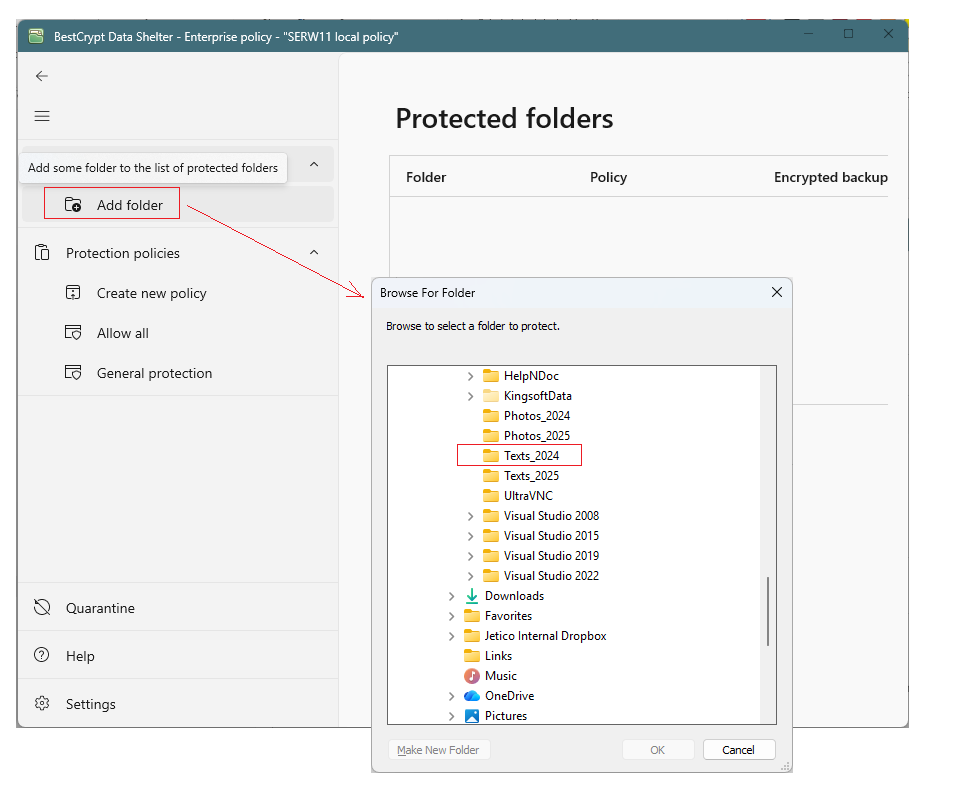
4. Add a folder for protection
In BestCrypt Data Shelter, click Add folder and select the folder that should be protected.
Example:
C:\Users\ser\Documents\Texts_2024
After the folder is selected, Data Shelter prompts you to choose how the local policy should be created.
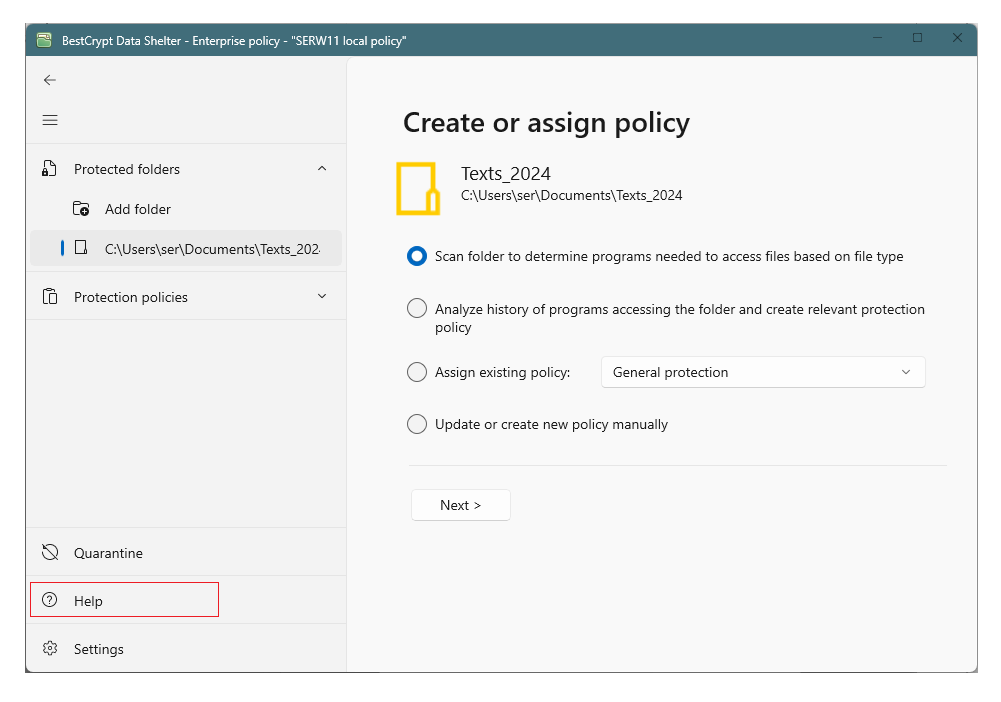
5. Create or adjust the local policy / policies
Create the policy using one of the available local methods.
You can:
- Scan folder to determine programs
Data Shelter scans the folder, identifies file types, and allows applications associated with those file types. Learn more. - Analyze history of programs accessing the folder
Data Shelter temporarily observes which programs access the folder and uses this activity to create a policy. Learn more. - Create the policy manually
The local administrator selects the allowed users and applications directly.
Use the assisted methods when you are not sure which applications should be allowed. Use manual configuration when the required access rules are already known.
Repeat this process for each folder that should be included in the imported JCM policy.
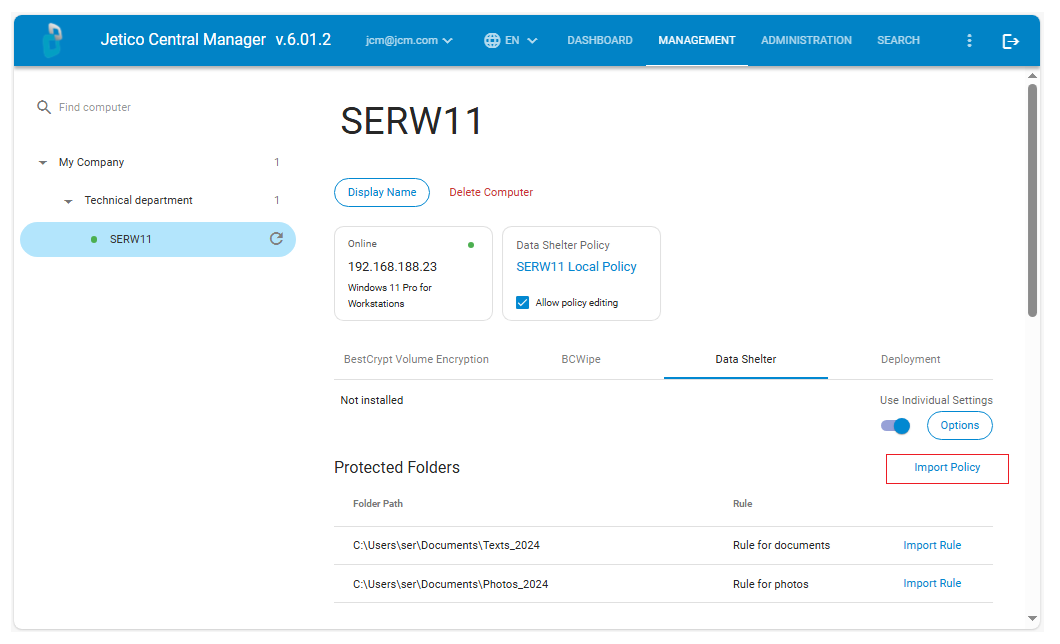
6. Return to the computer page in JCM
After the folder protection settings are created or changed on the client computer, return to the same computer page in the JCM Console.
The client computer sends its current Data Shelter configuration to JCM automatically. JCM displays the protected folders configured on that computer together with their associated local policies.
In JCM, these local policies correspond to protection rules. Each protected folder and its associated rule is shown as a separate folder-rule entry.
At this stage, the configuration is available for review, but it has not yet been saved as a Global Policy.
7. Import a rule or the full policy
Choose the import option that matches what you want to reuse.
To reuse only one local folder access configuration, click Import Rule next to the relevant folder-rule entry.
To reuse the complete configuration from the client computer, click Import Policy.
If you import the full configuration, JCM creates a new Global Policy that contains the protected folders from the client computer and converts the associated local policies into JCM protection rules.
8. Review the policy before import
After you click Import Policy, JCM opens the import form.
Enter a clear name for the new Global Policy and review the imported configuration.
The imported policy includes the protected folders from the client computer and the corresponding access rules created from the local Data Shelter policies.
If the policy should be reused on other computers, adjust local folder paths to make them more general by clicking Edit Rule.
Example:
C:\Users\ser\Documents\Texts_2024
can be changed to:
C:\Users\*\Documents\Texts_*
This allows the policy to match similar folder structures on other computers, even when user names or folder suffixes are different.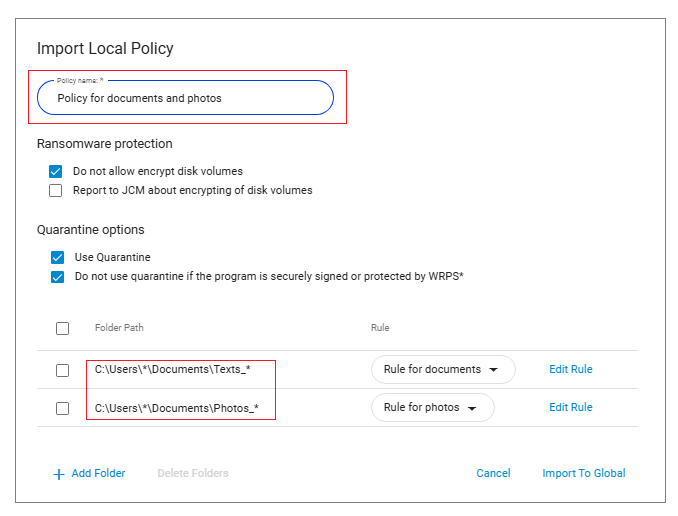
9. Import the policy as a Global Policy
Click Import to Global.
JCM saves the imported client configuration as a new Global Policy.
The new policy can now be reviewed, edited, and applied to other client computers or computer groups.
For deployment instructions, see Applying Protection Policies.