Quick Start
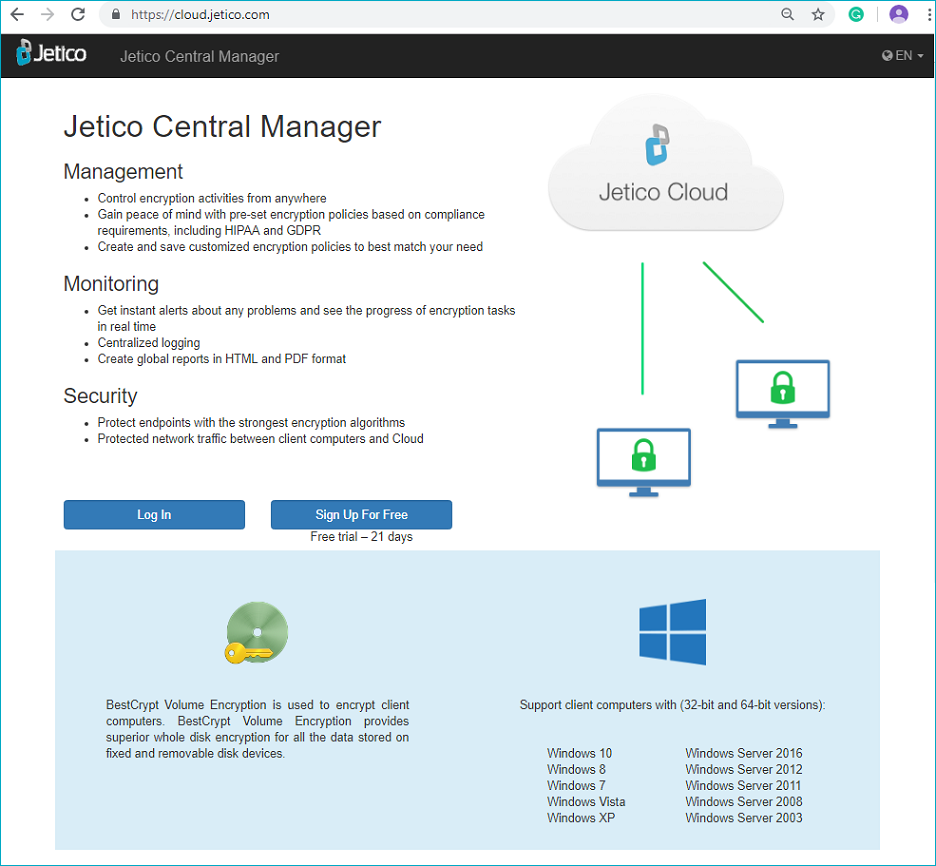
To start using Jetico Central Manager in the Cloud, type the following address into your browser's address bar: cloud.jetico.com
The following web page will be displayed:
Click Sign Up For Free and fill in the form:
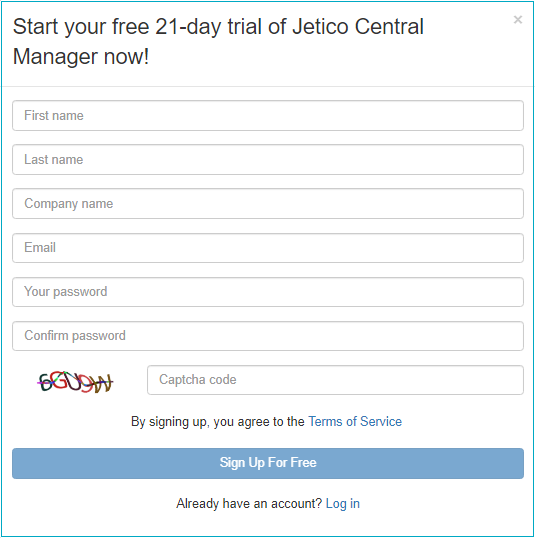
In the form, 'Company name', 'Email' and 'Password' fields are mandatory. Please enter your real email to be able to receive email notifications from JCM Server.
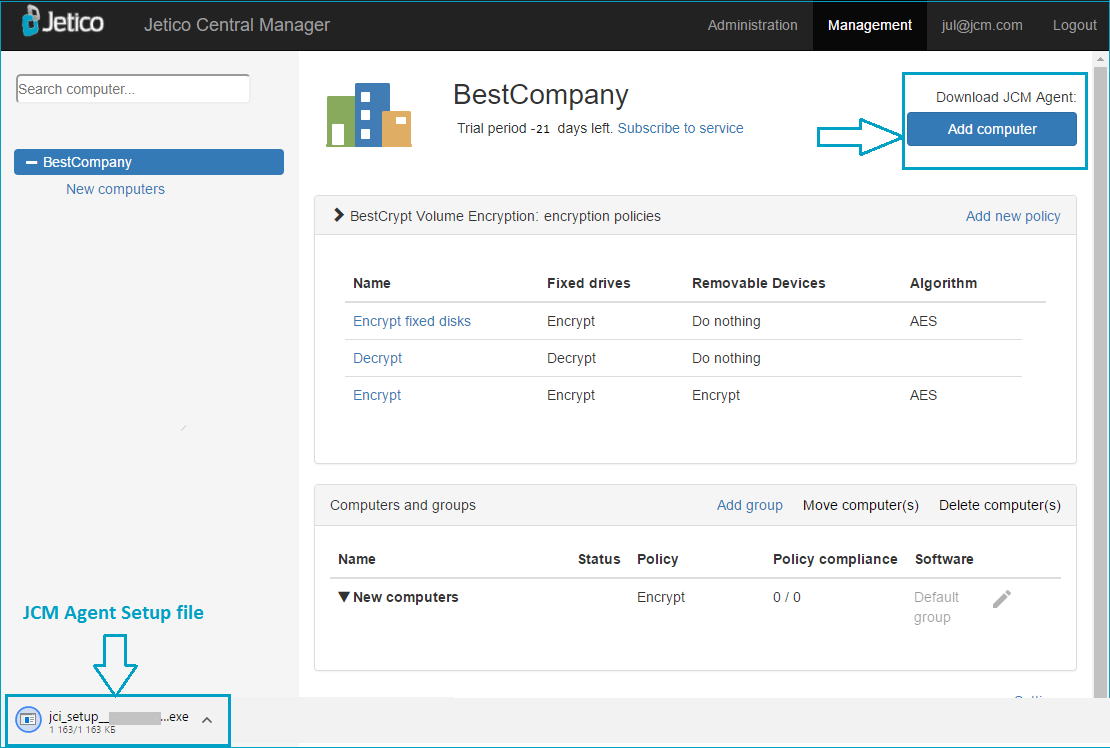
As soon as the account is created and you logged in, JCM Console appears and looks like:
The following steps will encrypt your company's computers with default settings:
- Create JCM Agent Setup file. Now click Add computer and see in the bottom part of the browser that the JCM Agent Setup file is downloaded.
Copy this Setup file to a network shared location, or to a USB stick.
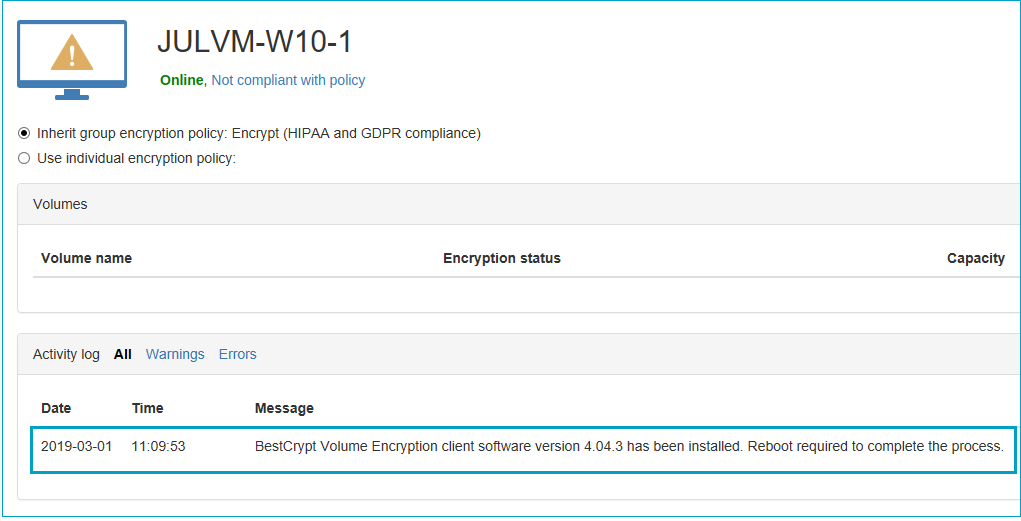
- Add client computer. Run the Setup file on a computer that should be encrypted (client computer). The Setup program will be running silently. After installation of the JCM agent,
JCM Console will show the computer added to database. Agent will connect to the server and install the client software automatically. After installation of the client software, the log message
will be sent to the computer page of JCM console:
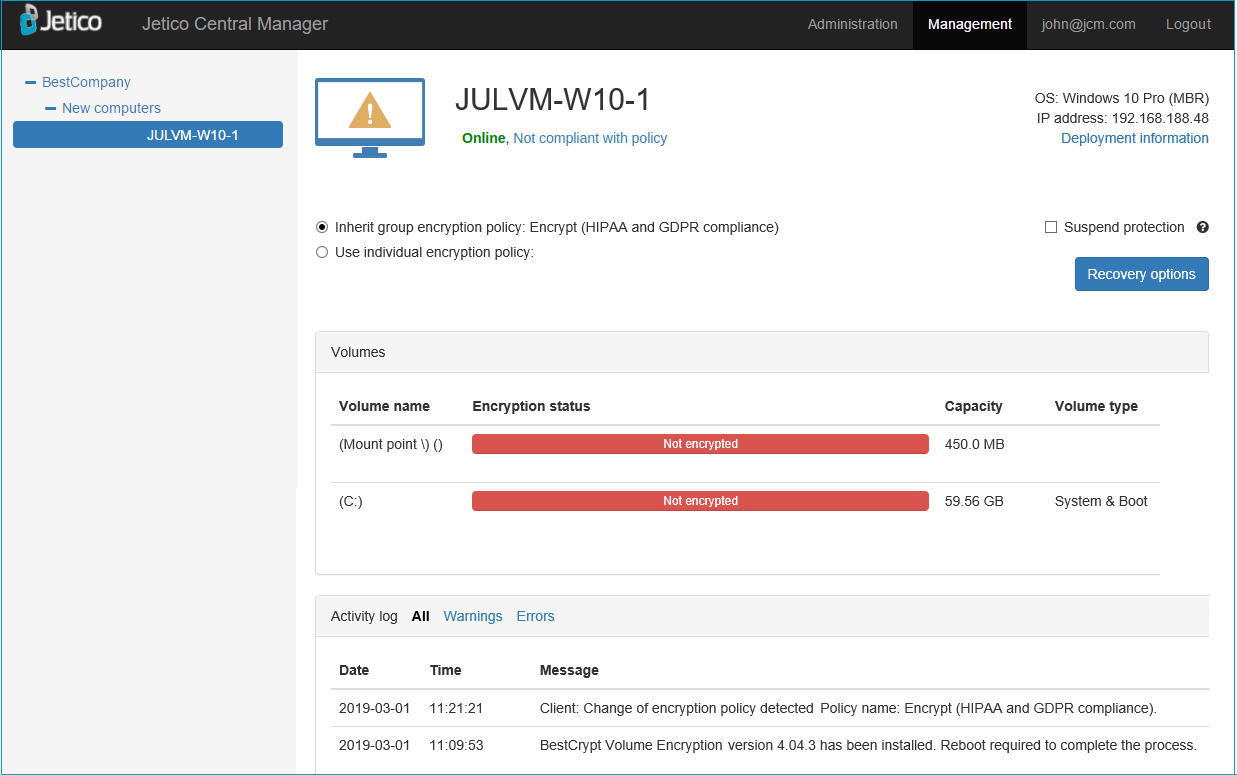
After reboot, client software will send the information about the computer (OS, IP address, volumes) to JCM server and the assigned policy will be applied:
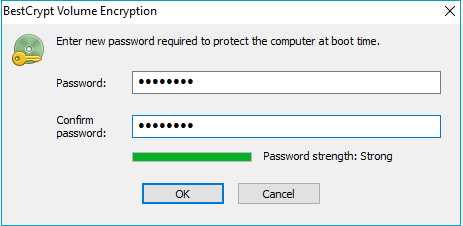
- Encrypt the computer. The program on the client computer will ask to enter the password to encrypt the computer:
After password is entered, the encryption process will start and will be running in the background. JCM Console will show the progress.
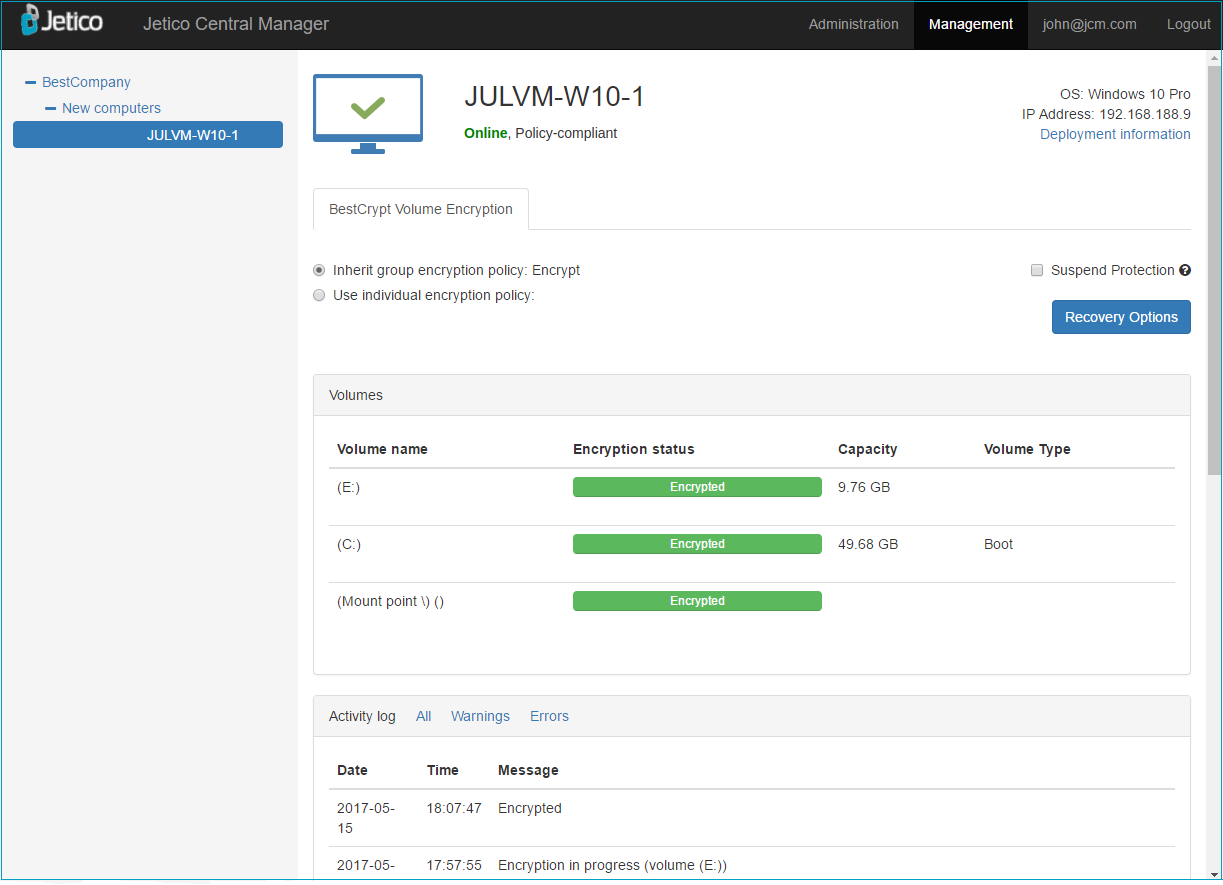
- Process completed. When all the disks are encrypted, JCM Console will report that the computer is policy-compliant:
- Repeat steps 3 and 4 for all client computers that need to be encrypted.