Bootable media
The starting page of BCWipe Total WipeOut Configuration Wizard offers selection for the bootable medium type.
🗲HINT: Jetico recommends choosing the USB drive option. The CD/ISO option is only available in the Enterprise Edition for the devices with no USB ports available.
To get here, launch BCWipe Total WipeOut Configuration Wizard via Start --> BCWipe Total WipeOut --> BCWipeTWO Configuration Wizard. You will see the following window:

A Bootable USB drive RECOMMENDED is the most universal option. It is suitable for most types of target endpoints and unlike an ISO or an EXE the USB can be used to store wiping logs during the process. This option is OS-independent and can be used for computers that will no longer start up (corrupt OS or no OS at all).
🗲 The following two options, namely ISO Image and EXE to wipe a Windows computer are available exclusively with the Enterprise License. If you require this functionality, contact us here.
An ISO image can be used for booting virtual machines or creating bootable CDs. Using CDs might be required when no USBs are allowed on-site or when a target endpoints have no USB ports. However, being read-only media, ISOs and CDs cannot store the wiping logs. To enable logging with an ISO or a CD, plug in a USB to save logs to or configure saving the log files to a network share Enterprise
An EXE to wipe a Windows computer is designed to configure active endpoints running Windows OS for automated erasure. After the output .exe file is launched on the target computer, it will reboot into BCWipe Total Wipeout wiping utility. To enable logging with an EXE, plug in a USB to save logs to or configure saving the log files to a network share Enterprise
Click on the option you would like to learn more about within the screenshot above and you will be redirected to the corresponding part of the article automatically.
Creating a bootable USB
If you choose Bootable USB drive, the following window appears:
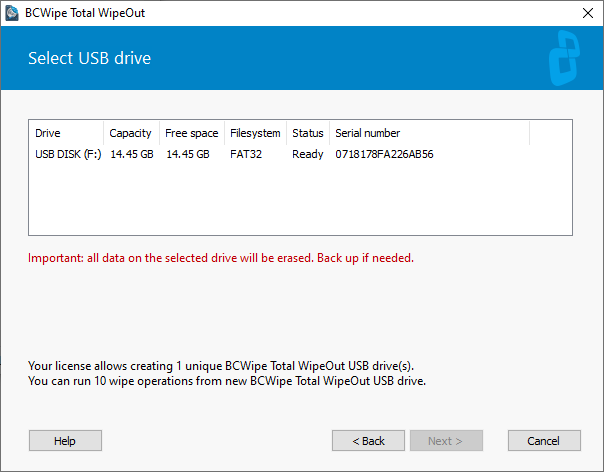
The window contains the list of all removable USB drives connected to the computer and detected by the Configuration Wizard. For each drive, the Wizard reports its' volume label and drive letter, capacity, available free space, file system, status and serial number. The status field may contain the following values:
- Format required - the Wizard will invoke the Format dialog for the USB drive
WARNING: Format will erase all data off the USB drive. Save the important files elsewhere before using the drive for BCWipe Total WipeOut,
- Ready - current drive format is suitable for BCWipe Total WipeOut, the Wizard will copy necessary files without formatting the drive
- Bootable drive - the drive is bootable; it is likely to already contain BCWipe Total WipeOut USB
Select a drive to be configured as BCWipe Total WipeOut and click  to move to the next step of the Configuration Wizard.
Creating .ISO image or CD
Note: The option to create a bootable CD / ISO is only available in the Enterprise Editions of BCWipe Total WipeOut.
If you choose ISO image, the Wizard will prompt you to select where to save the .ISO to once ready
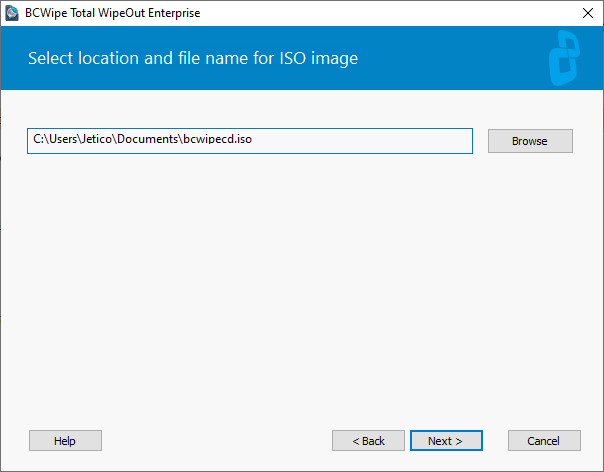
By default, BCWipe Total WipeOut saves the output .ISO files to your Documents folder. If you would like to change that destination, type in a path to the preferred folder manually, or click  and select the folder in Windows Explorer.
Once the ISO is ready, use a CD Burning software of your choice to burn the BCWipe Total WipeOut ISO image to CD disk.
When ready with this step, click to move to the next step of the Configuration Wizard.
Creating .EXE to wipe a Windows computer
Note: The option to create a bootable EXE file for Windows is only available with the Enterprise License for BCWipe Total WipeOut.
After you click EXE to wipe a Windows computer, the Wizard will prompt you to select where to save the .EXE to once ready.
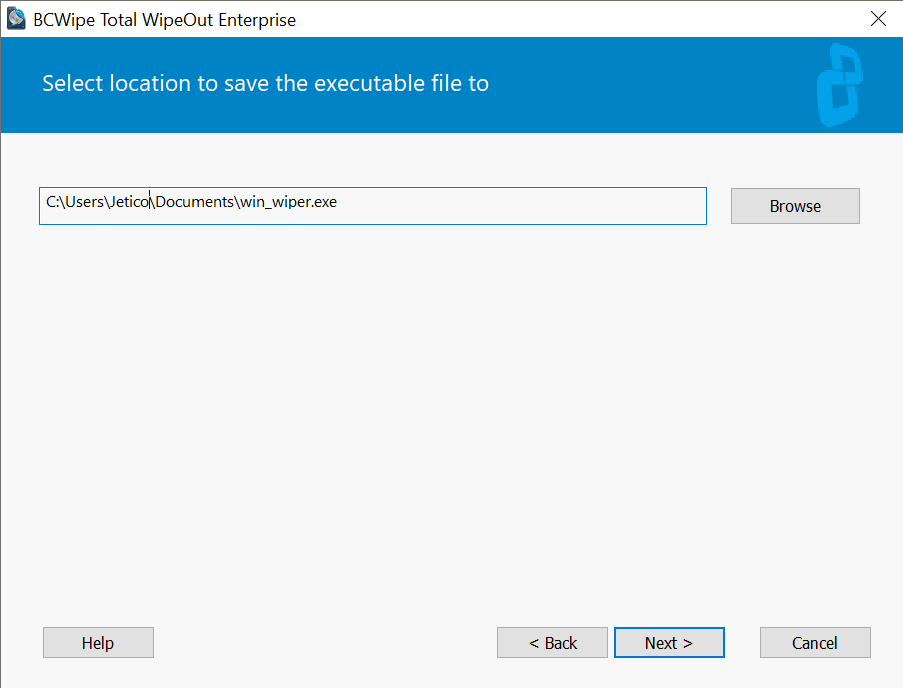
By default, BCWipe Total WipeOut saves the output .EXE file to your Documents folder. If you would like to change that destination, type in a path to the preferred folder manually, or click and select the folder in Windows Explorer.
Once the EXE is ready, copy the file to the target Windows machine and run it. Review the detailed steps in this article: Booting target device with an EXE file.
When ready with this step, click to move to the next step of the Configuration Wizard.
Next topics: