Policy Management
The Policy Management block of General page includes the list of all wiping policies alongside the controls to create, edit and delete those. Learn more about the Dashboard and the controls it hosts here: Dashboard
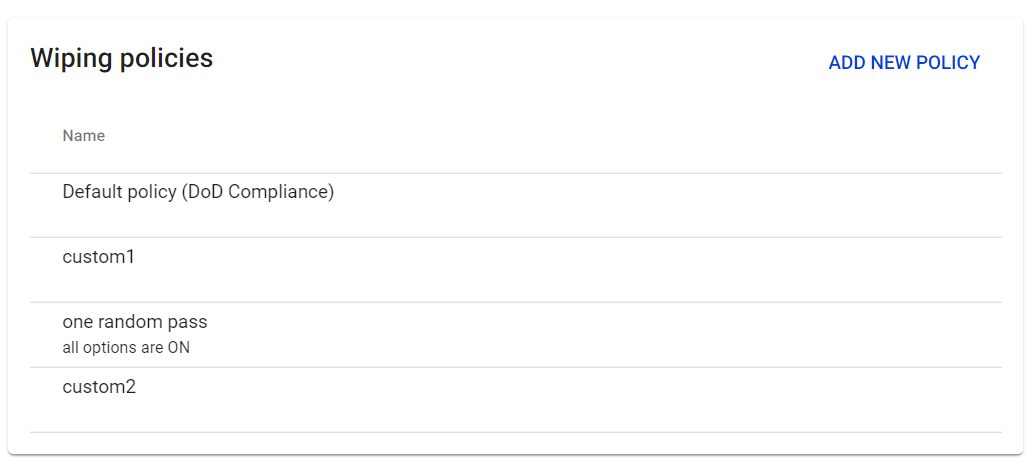
Wiping policies
A wiping policy is a set of options including wiping schemes, verification settings and hardware-level wiping commands that can be customized, stored and assigned to target devices.
BCWipe Total WipeOut introduces memory-type-specific wiping policies. HDD, SSD, hybrid drives and removable media are all built uniquely and require unique approach to wiping as well. For each of the drive types, Jetico engineers have carefully selected a wiping scheme that ensures the most effective results with minimal lifetime impact.
The settings recommended by the Jetico experts are available under Default Policy (DoD Compliance). In addition to compliance with the DoD requirements, this policy also complies with other common regulations including NIST SP 800-88 Guidelines, GDPR, HIPAA and more.
Adding a wiping policy
To add a custom wiping policy, click ADD NEW POLICY. The following window opens:
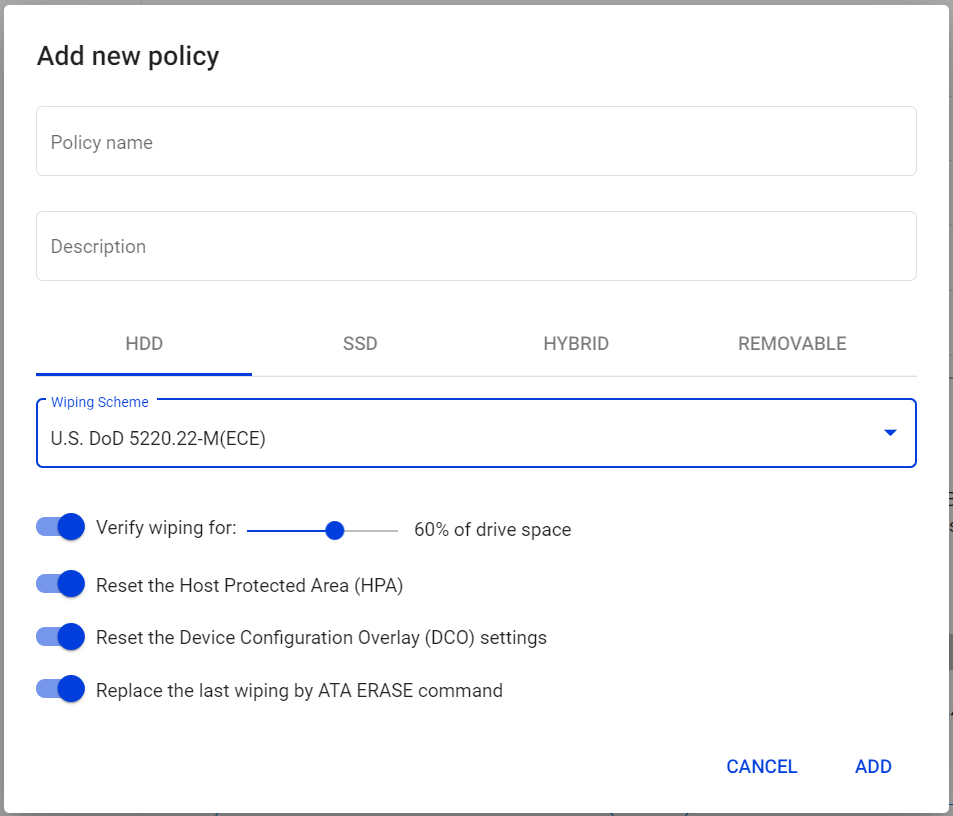
For the new policy please fill out these fields:
Policy name - choose a unique name that policy will appear in the interface once you've saved it.
Description (optional) - a short memo that might be useful later, if necessary.
Wiping settings
Switch between the drive / memory types using the tabs HDD / SSD / HYBRID / REMOVABLE*. In each of the tabs, adjust the following settings:
The drive type is automatically detected by BCWipe Total WipeOut Wiping Utility. However, the result might depend on the connection type as well:
For example, a SATA SSD drive connected via eSATA will be detected as an SSD. The same drive connected via USB mobile rack will be detected as a removable drive.
Wiping scheme - select one of the 15+ built-in wiping schemes. Click here to review the list of wiping schemes available in BCWipe Total WipeOut and see what's recommended for each of the drive / memory types: BCWipe-Wiping-Schemes.pdf
When Verify wiping for x% of drive space is enabled, after finishing the wiping task, BCWipe Total WipeOut will perform a verification step eliminating the possibility of an error by checking every sector and making sure the data has been overwritten for good.
Adjust the slider position to manage Customizable Verification (new in BCWipe Total WipeOut 5). This help boosting performance by spending less time on sector-by-sector verification. Depending on the slider position between 5% and 100% BCWipe will randomly sample and verify only the selected amount of sectors.
* The following options are only available for ATA/SATA-connected HDD, SSD an Hybrid drives:
ATA hard drives controllers support low-level configuration of the drives so that a specified number of sectors may be hidden from operating system. The hidden sectors can store sensitive information, especially if a whole hard drive capacity was earlier used and then the hard drive was re-configured on a low-level to use a smaller number of sectors. It is also difficult to predict that some kind of viruses will not appear in future that will use the feature of ATA hard drive controller to hide themselves in the hidden hard drive areas.
ATA hard drives support Host Protected Area (HPA) and Device Configuration Overlay (DCO) to hide hard drive sectors from operating systems. When the Reset Host Protected Area (HPA) or Reset Device Configuration Overlay (DCO) are enabled, BCWipe Total WipeOut will automatically wipe the corresponding drive areas when detected.
BCWipe Total WipeOut can execute the hardware-level Secure Erase command from the disc controller that combined with the standard software-level data erasure techniques will ensure the most reliable results. To enable this functionality, set the Replace the last pass by ATA ERASE command ON.
🗲HINT: The Replace the last pass by ATA ERASE setting delivers the most benefit for SSD and NVMe SSD drives, while for regular HDD it can typically be omitted.
Once you're finished customizing the policy, click ADD to save it. It will appear in the list under Wiping Policies and become available for use in Configuration Wizard and in the web console.
Editing and deleting policies
To edit a custom wiping policy, simply click on the policy name under Wiping Policies. The Edit Policy dialog will open.
Make the necessary changes, then click SAVE to apply.
To delete a custom wiping policy, hover over the policy name under Wiping Policies until the Delete button appears. Click Delete and you will receive the confirmation message:
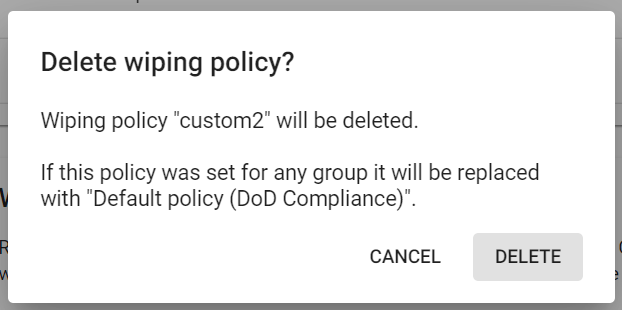
To confirm deletion, click Delete one more time. This action cannot be undone. Any group that had the deleted policy assign will be reset to Default policy instead.
The Default policy cannot be deleted.