Creating a wiping task
The lower toolbar of BCWipe Task Manager contains the controls that allow you to add and manage scheduled wiping tasks. New tasks are added to the list above the toolbar.

Follow these steps to create a new wiping task:
Step 1. Click ‘Add task’ on the lower toolbar of BCWipe Task Manager. The following window will appear:
![]()
You can also type in a name for the new wiping task in the edit box at the top of the screen.
Step 2. Choose what to wipe by clicking on the toggle next to the required wiping command. The view will expand offering a more detailed selection.
🗲HINT: Multiple wiping commands can be selected within the same wiping task
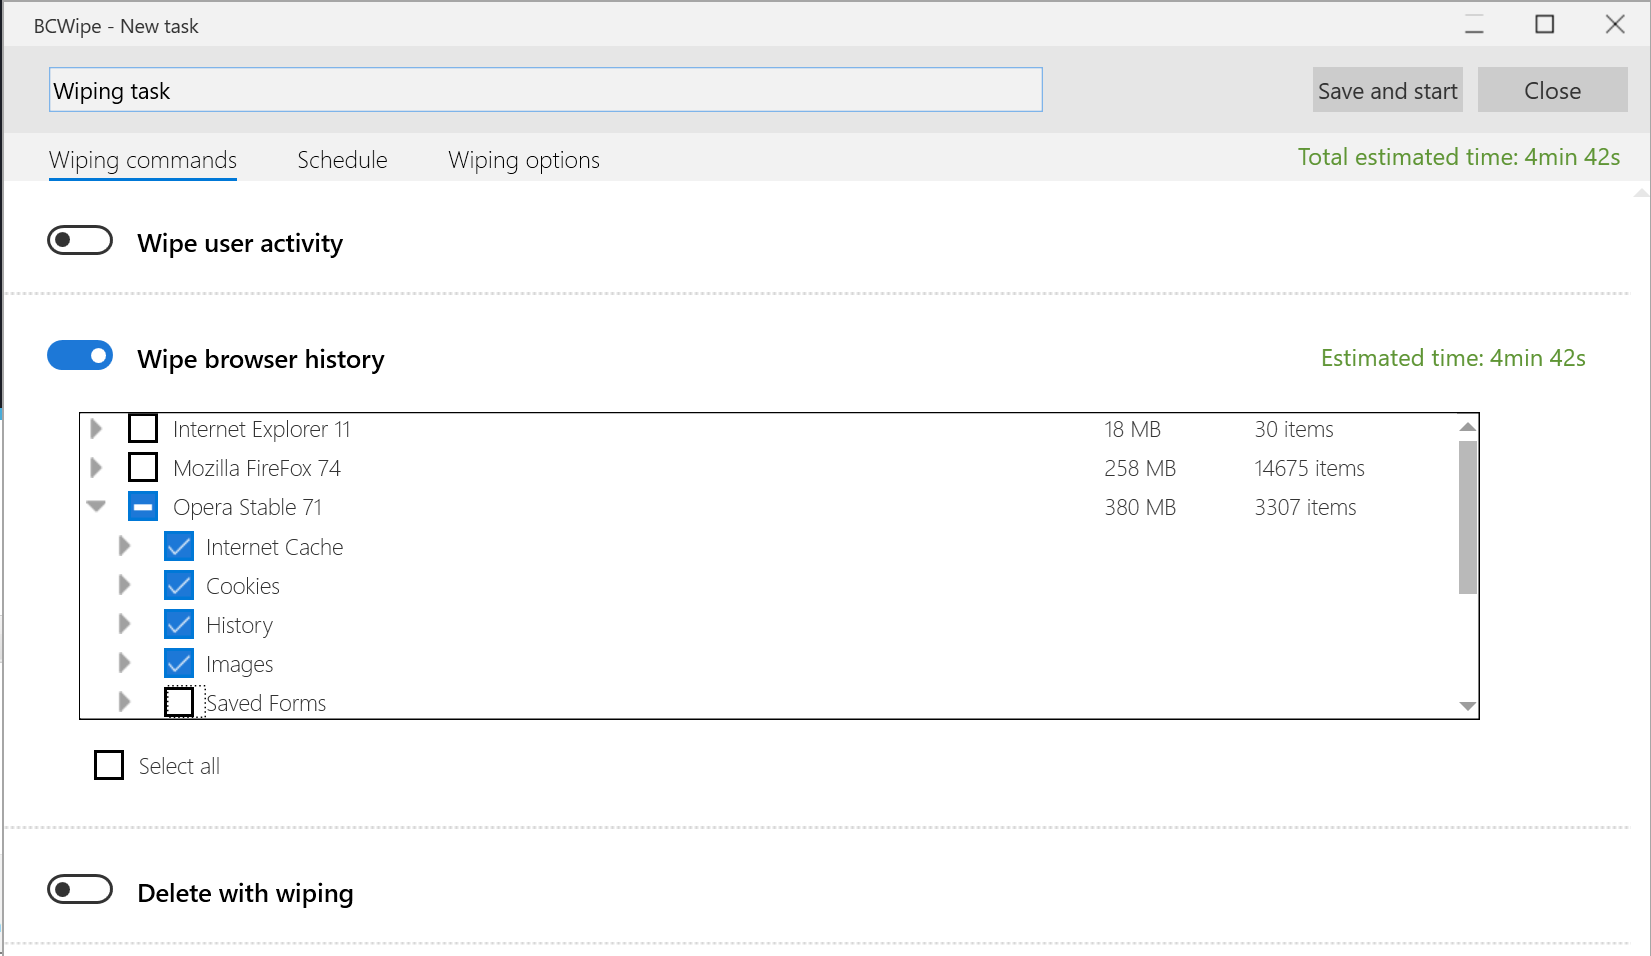
Select the elements you want to wipe by checking the relevant boxes. Check the ‘Select all’ box to wipe all elements in the category.
Step 3. Click ‘Save and start’ to execute the wiping task right away. You will then return to BCWipe Task Manager, where you can follow the progress of the wiping task in real time.
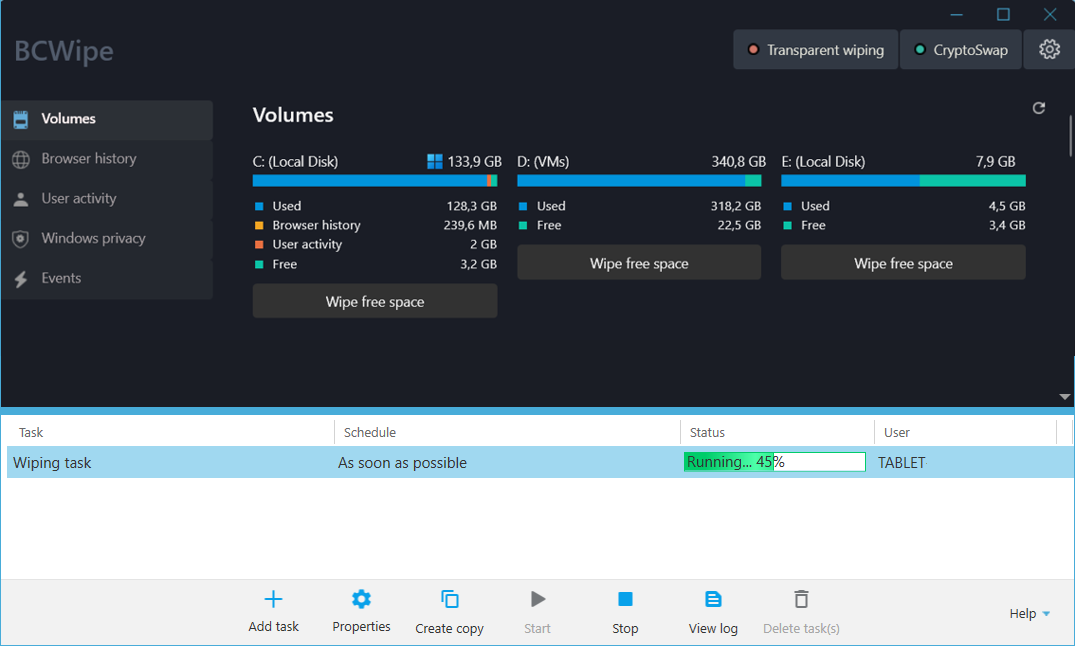
These three simple steps are all it takes to start a wiping task. However, further options are also available.
Read more about each wiping command: Wiping commands
Learn how to schedule a wiping task to run automatically: Schedule
Read about advanced wiping options here: Wiping options