Company Page
The company page is a part of JCM Console that appears if a company is selected in the left pane:
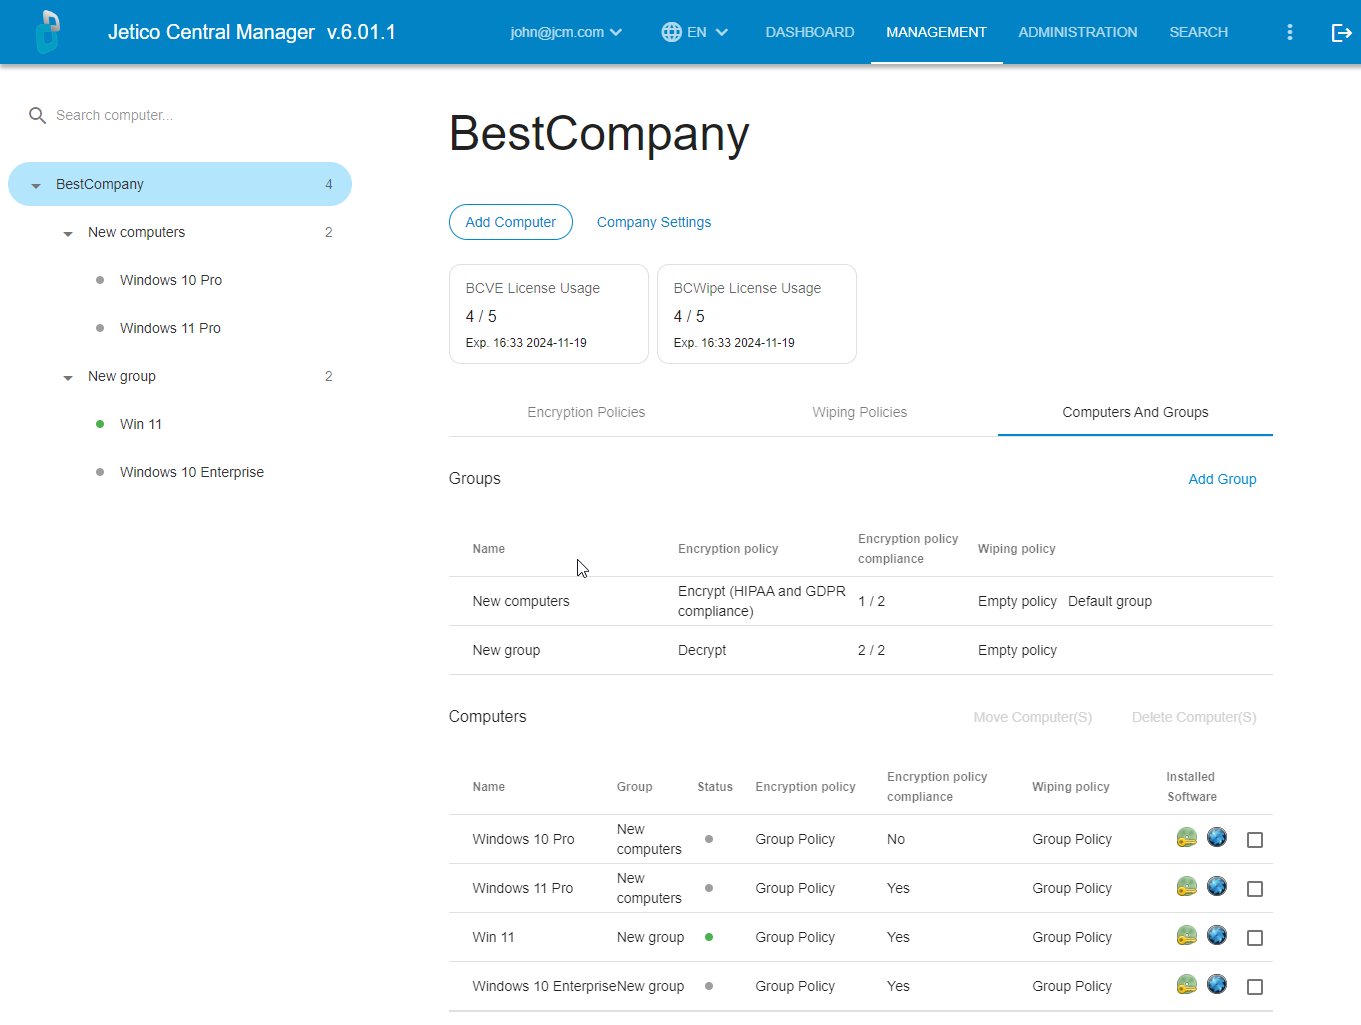
The top part of the page shows the company name, information about the license and may show the customized company logo, if it was assigned. The company page is the default view once a JCM administrator logs into the program. In order to manage client computers, it is necessary to add these computers to JCM database first. Therefore, the page contains Add computer button. As well, it contains the lists of encryption and wiping policies and the multi-functional table Computers and groups.
Adding computers to database
The JCM administrator can add a computer to the database by following these simple steps:
- Click Add computer button.
If support for Mac client computers is enabled in the configuration file, you will choose between downloading the installer for Windows or Mac computer.
If you do not use Mac client computers, you can disable this option in the configuration file. - The JCM Agent installer will be downloaded automatically. The name of the file has the following format:
jci_setup__JCM_SERVER_IP_PORT_NUMBER_COMPANY_ID_HASH__.exe
or - for Mac computers:
jci_setup__JCM_SERVER_IP_PORT_NUMBER_COMPANY_ID_HASH__.sh
For example:
jci_setup__207_154_213_48_8443_10002_31bd461e985bb638e1b6264c__.exe
WARNING: Do not rename the file!
- Run the downloaded file on the target computer to be encrypted. It is possible to automate the installation using a third-party tool. For example, see this instruction.
🗲HINT: By default, the installation is performed in silent mode, which means that no pop-up messages are displayed on the target computer. To run the installation in verbose mode (might be required for troubleshooting), run the 'jci_setup..' executable from Command Prompt with -V as a parameter: >jci_setup__207_154_213_48_8443_10002_31bd461e985bb638e1b6264c__.exe -V
- After a successful installation of JCM Agent, the computer name should appear in the New computers group.
If the new computer should be added in other group, the 'jci_setup..' file should be run from Command Prompt with the parameter -G followed by the group name using the following format:
>jci_setup__207_154_213_48_8443_10002__.exe -G#MY GROUP NAME#
If the group does not exist, it will be created automatically, and the default encryption policy will be assigned.
List of Computers and Groups
Once a computer has been added to the database, it will appear in the List of Computers and Groups in the left panel.
Clicking on the computer name will open the Computer Page for corresponding client computer.
Clicking on the Group will open the corresponding Group Page.
🗲HINT: To expand the view for selected group and see all computers in that group, click the + icon next to the group name.
Depending on a computer's state and settings, additional icons may appear near the computer name in the list of computers and groups:
|
|
- restart is required after the installation |
|
|
- individual policy is set |
|
|
- error occurs on the computer |
|
|
- error occurs on the computer |
|
|
- protection is suspended |


Embedded encryption policies
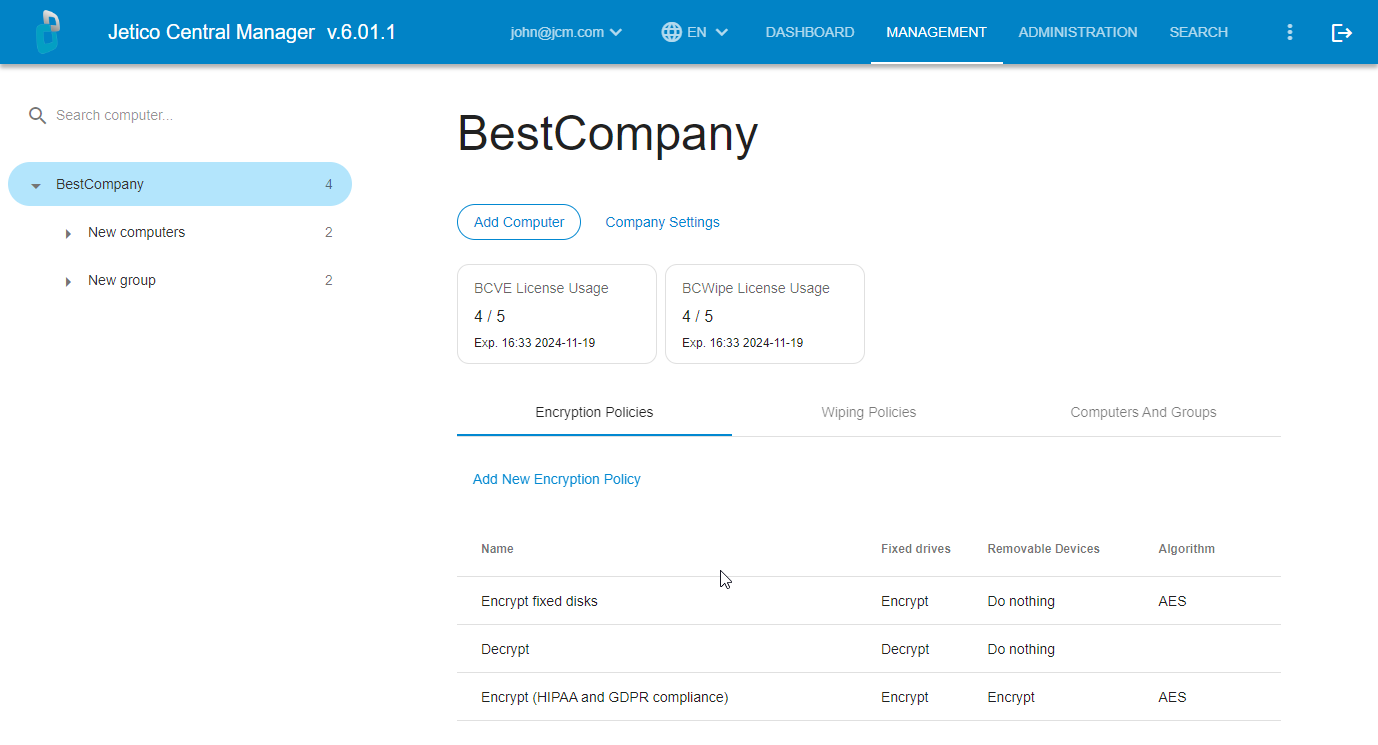
Central Management of BestCrypt Volume Encryption enables JCM Administrator to enforce data protection on the client computers by assigning an encryption policy. BestCrypt Volume Encryption installed on the client computer applies the encryption policy, assigned by administrator. There is a number of embedded encryption policies; these policies were created automatically and exist just after JCM installation. The picture above shows these policies. The default policy is Encrypt (HIPAA and GDPR compliance). Read more about adding new encryption policies and editing existing ones in Encryption policies.
Embedded wiping policies
Central Management of BCWipe enables JCM Administrator to enforce data protection on the client computers by assigning a wiping policy. BCWipe installed on the client computer applies the wiping policy, assigned by administrator. There is a number of embedded wiping policies; these policies were created automatically and exist just after JCM installation. The default policy is Empty policy . Read more about adding new wiping policies and editing existing ones in the Creating a wiping policy article.
Table 'Computers and groups'
The central part of a company page presents the table Computers and groups. It allows the JCM Administrator to perform many useful functions:
- Create a new computer group
- Rename an existing group
- Delete an empty computer group
- Move a computer to other group
- Delete one or several computers from the database
- View the encryption policies assigned to computers and groups
- View the wiping policies assigned to computers and groups
- View the status of computers in the database (whether they are online or offline)
- See which computers in the database are 'policy-compliant'
- View what client software is installed as well as the version number and date of the last update
- Install/uninstall client software
Company settings
At the bottom right corner of the Company Page is a Settings button which opens a dialog where global company settings can be viewed and edited. Read more in the dedicated article Company Settings.
This is an example of simple view of Company page with two computer groups:
See also:
JCM Administration Console: Companies and Licenses
JCM Administration Console: Backup of JCM Database