An Adminstrator of Jetico Central Manager can manage software on remote client computer depending on the user who works on the computer. For example, administrator can decide what software should be installed on remote computer if some user logs on to the computer. To get such a user-oriented management of company network it is recommended to install Windows network with Domain Controller Server. In this case every computer in the network can get user-specific command file (so-called Logon Script) running when the user logs on to the computer.
Before starting to manage users-oriented company network the administrator should get the users listed in Jetico Central Manager Database. The article explains how to add users to the database, remove them from the database and how groups of users can be created. All the operations with users can be done through Jetico Central Manager Console.
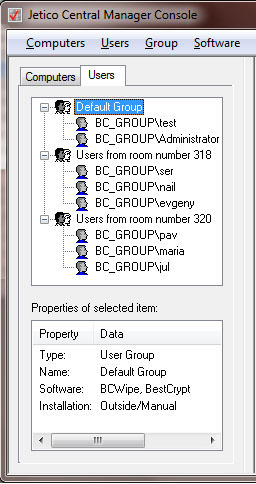
The Database always has Default Group for users. If administrator is not sure yet what group scheme to choose, it is possible to put all the users to the Default Group. Then step by step new groups will be created and administrator can simply drag-and-drop users from the Default Group to any other groups.
To create new empty group in Users tab run command New Computer/User Group from menu. Alternatively it may be done from the context menu: right-click with your mouse anywhere on the Users tab field and run New User Group command.New group with default name will be created and name of the group can be changed at that time. It is also possible to edit the name at any time later by clicking on the group name with mouse or by running Rename Group command from menu.
After creating new users' group you can move users earlier added to the Jetico Central Manager Database from other user group (for example, from the Default Group) to new group using drag-and-drop mouse operation.
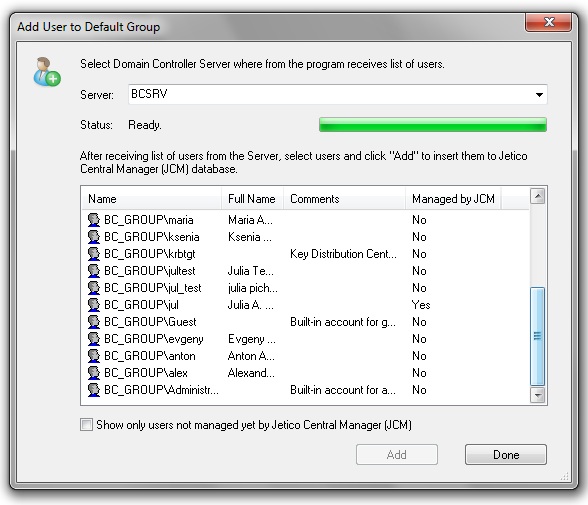
Select as many users as you want to add to the selected user group and click .
Show only users not added earlier to the JCM database - mark the checkbox if you want to see only those users who have not been added to the JCM database earler.
To remove a user from the Jetico Central Manager Database select the user in the left tab of the Jetico Central Manager Console and run Remove User command from Users menu. To remove the whole group, select the group of users and run Delete Group command from Group menu.
After running the Remove command you will be asked if you also want to remove the computer where the user works. If the pair - computer and user - are removed, client software deployed on the computer by Jetico Central Manager will be uninstalled, and JCM agent will be removed from the client computer as well.
Note: the uninstallation process will not run if the computer cannot communicate with the Database (for example, if computer has no network connection with server computer where service is running). It prevents from the incorrect uninstallation of the client software in case of accidental malfunctioning of the company network.