To install BCWipe Total WipeOut Enterprise Edition, follow these simple steps:
|
1. Run the installation file.
Download BCWipeTWO-enterprise-setup.exe following the link received fro Jetico Sales together with the license key. Double-click to start the installation process.
At this step, the Setup program will check if OpenJDK is already installed on the computer. If it cannot find an installation of OpenJDK or if the version is too old, the following message will be displayed:
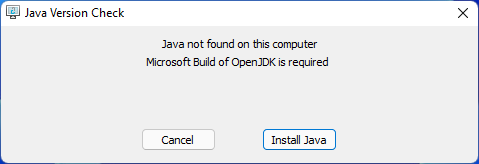
Click Install Java for Setup to automatically download and deploy the required version of Microsoft's OpenJDK.
Wait for the process completion. Setup will then move to the next step automatically.
We also recommend reviewing the system requirements for BCWipe Total WipeOut.
|
|
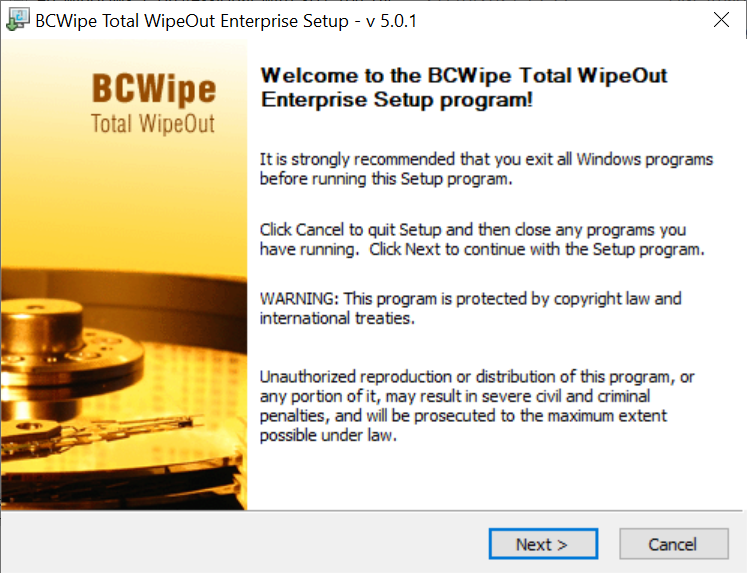
2. Follow the steps in the Setup Wizard
🗲HINT: To install BCWipe Total WipeOut with Default parameters, simply click Next throughout the Setup Wizard.
Use these controls to navigate the Setup Wizard. We will review the key dialogs in the next step.
 - aborts installation. - aborts installation.
 - proceeds to the next step of installation. - proceeds to the next step of installation.
 - returns to the previous step of installation. - returns to the previous step of installation.
|
|
|
3. Read the License Agreement
Read the License Agreement carefully and check 'I accept the Agreement' if you approve. Then click .
|

|
|
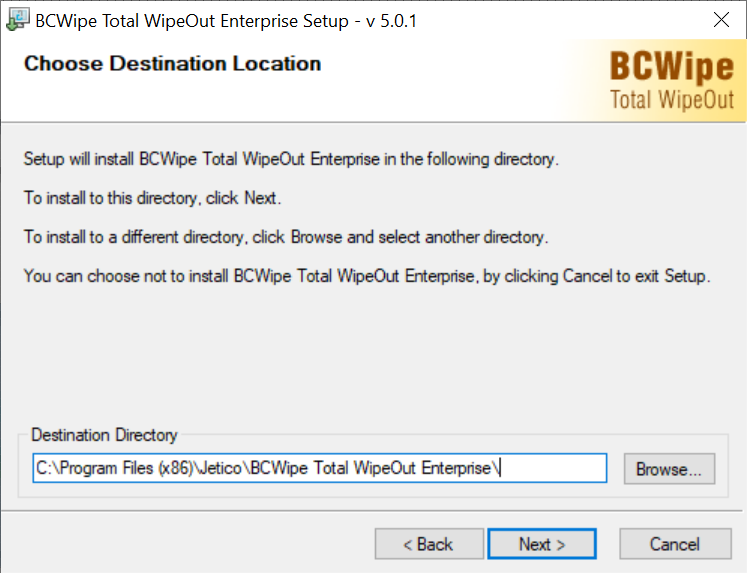
4. Choose Destination Location
By default, BCWipe Total WipeOut Enterprise will be installed to C:\Program Files (x86)\Jetico\BCWipe Total WipeOut Enterprise\
If you would like to change that destination, type in a path to the preferred folder manually, or click  and select the folder in Windows Explorer. and select the folder in Windows Explorer.
|
|
|
5. Select Program Folder
By default, BCWipe Total WipeOut Enterprise will be accessible from Windows Start menu under BCWipe Total WipeOut Enterprise program folder.
If you would like to change the name of the folder created for BCWipe Total WipeOut Enterprise in Start menu, type in a preferred name to the edit box manually.
Click  to initiate the installation process. to initiate the installation process.
|

|
|
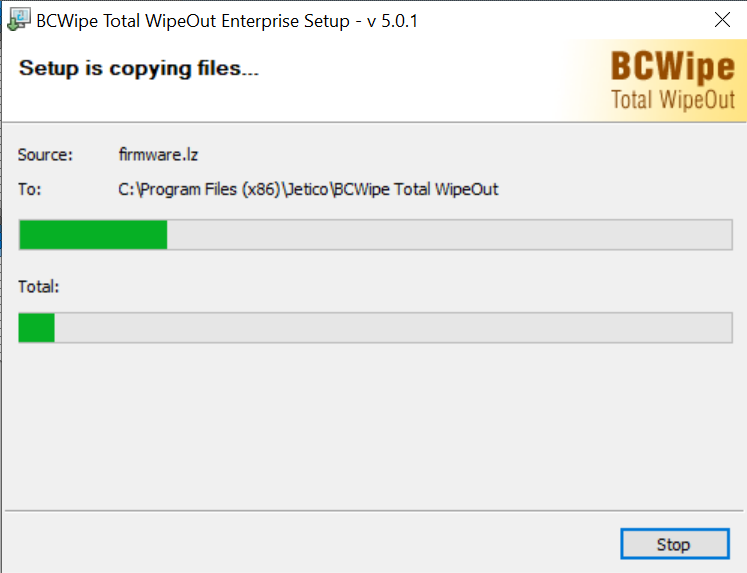
6. Copying files
Wait while setup is copying files and creating program directories.
If you need to abort the installation at this step (not recommended), click 
|
|
|
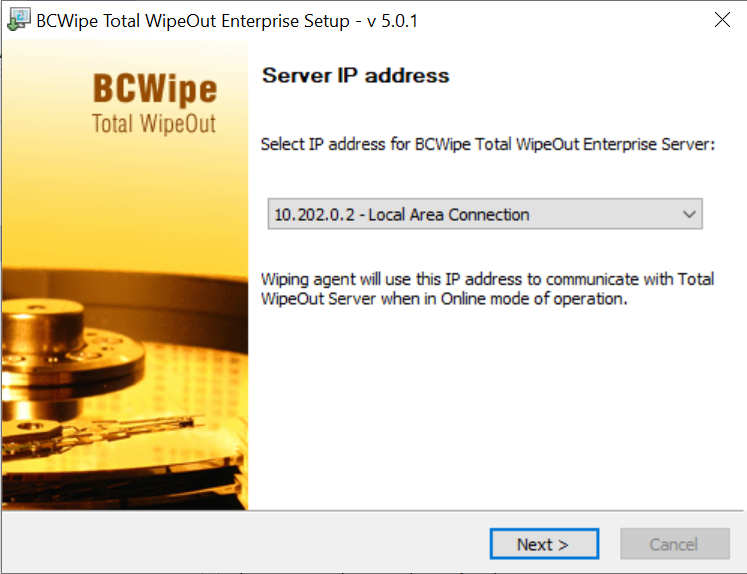
7. Select IP address
Select an IP address to be associated with BCWipe Total WipeOut Server. When running on target devices, BCWipe TotalWipeOut will use this IP address to contact the Server and send progress updates to the management console (Online mode).
Expand the drop-down menu to view all connections and IP addresses associated with the computer you're installing BCWipe Total WipeOut to. Select the preferred IP and click
🗲HINT: It is recommended to select a connection with a static IP.
You can later change the Server IP address in the application.properties file.
|
|
|
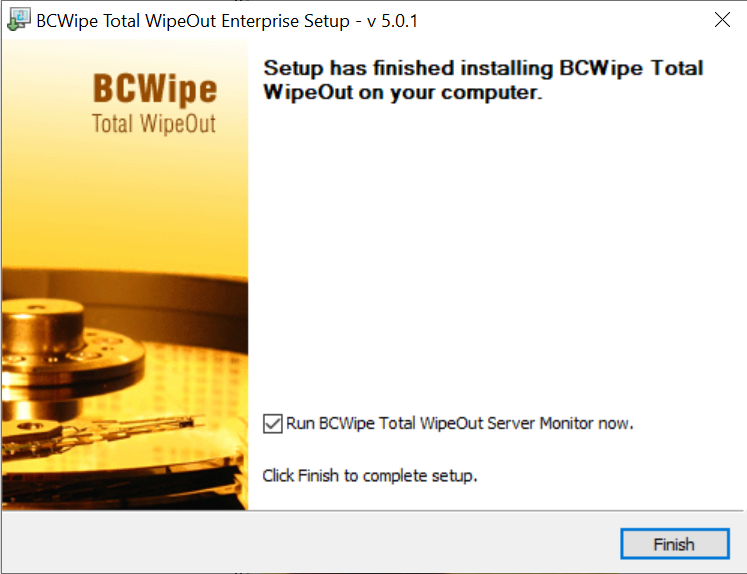
8. Final step
BCWipe Total WipeOut is ready!
Check "Run BCWipe Total WipeOut Server monitor now" to launch the web server and open the management console.
Click  to close the Setup Wizard. to close the Setup Wizard.
|
|