Task execution monitoring
After a policy is assigned, the client computer will report back with detailed statistics on the data targeted in each wiping task.
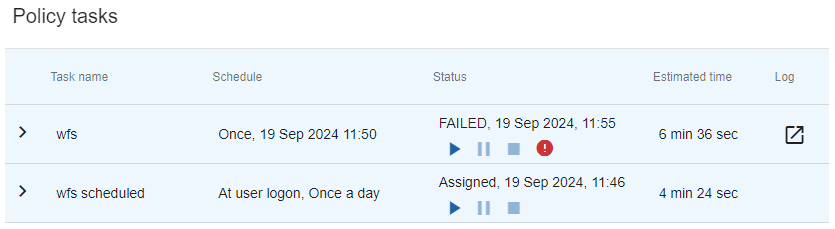
The list of tasks is available at the ‘Policy tasks’ area of the Computer Page.
For each task, you will find its:
- Task name
- Schedule
- Last status/Progress bar
- Estimated time for the next run/Time left
- Log file (if the task ran at least once).
Click on the drop-down menu icon next to a task name to view task details.
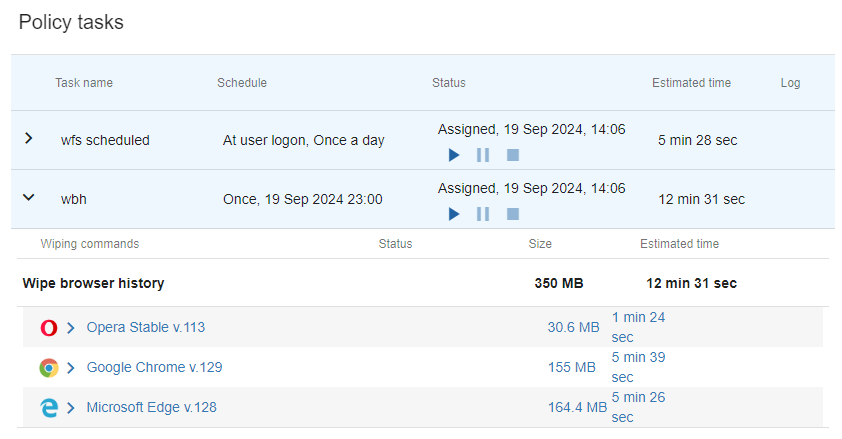
In the expanded view of a task, you will find the full list of ‘Wiping commands’ associated with that task. For each of the wiping commands and its elements, the total size of target files and estimated wiping time is provided.
🗲HINT: To view the specific paths that will be wiped as part of the task, expand the element by clicking on it, and then hover over the string to reveal the full path. When available, you can also click on ‘View more’ to view the paths as a list.
The tasks will automatically start according to the schedule. When the task is running, you can follow its progress in the Policy area of the Computer Page.
The progress bar in the status field shows the progress of a given task as a percentage. Next to it are the controls to:
![]() — Pause the task
— Pause the task
![]() — Terminate the task
— Terminate the task
The estimated remaining time is displayed on the right of the progress bar. Next to it is the control to view the log file for that particular task.
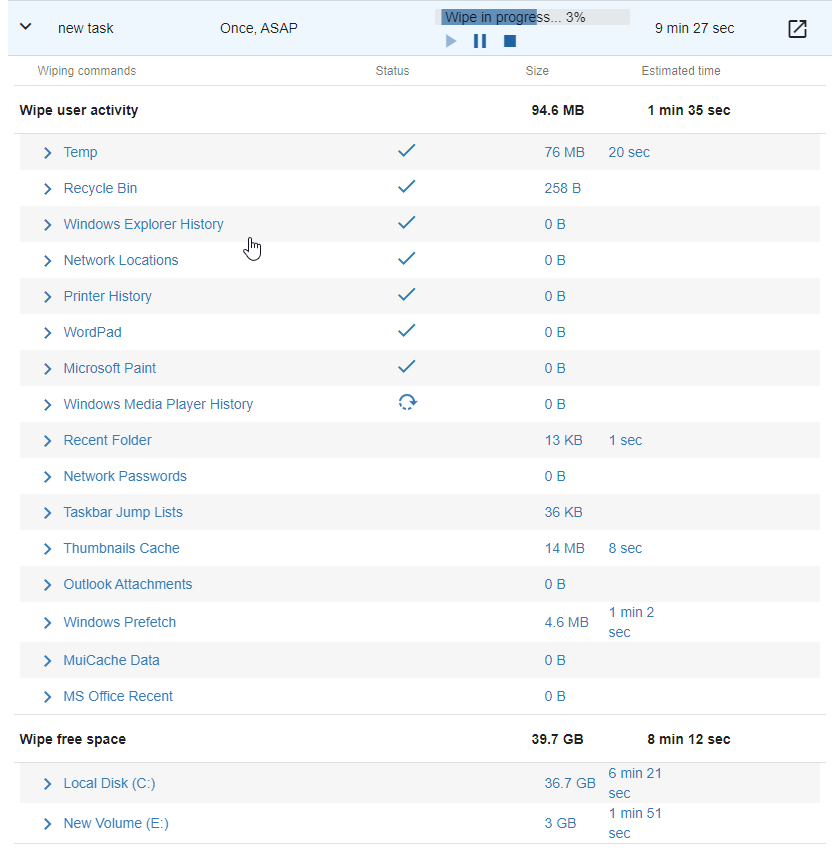
In the expanded view, the progress for each element is shown in the status field.
✓ — The element was wiped
🞈 — Wiping in progress
- — The element couldn't be wiped.
🗲HINT: When the selected computer is online, you can manually start a task by clicking on the ![]() icon in the ‘Status’ field.
icon in the ‘Status’ field.